
Archive
Deploy an Active Directory server using Microsoft Azure Virtual Machines (pt 1)
First thing we need to do is to take advantage of Microsoft Azure’s Free Tier services: https://azure.microsoft.com/en-us/free.
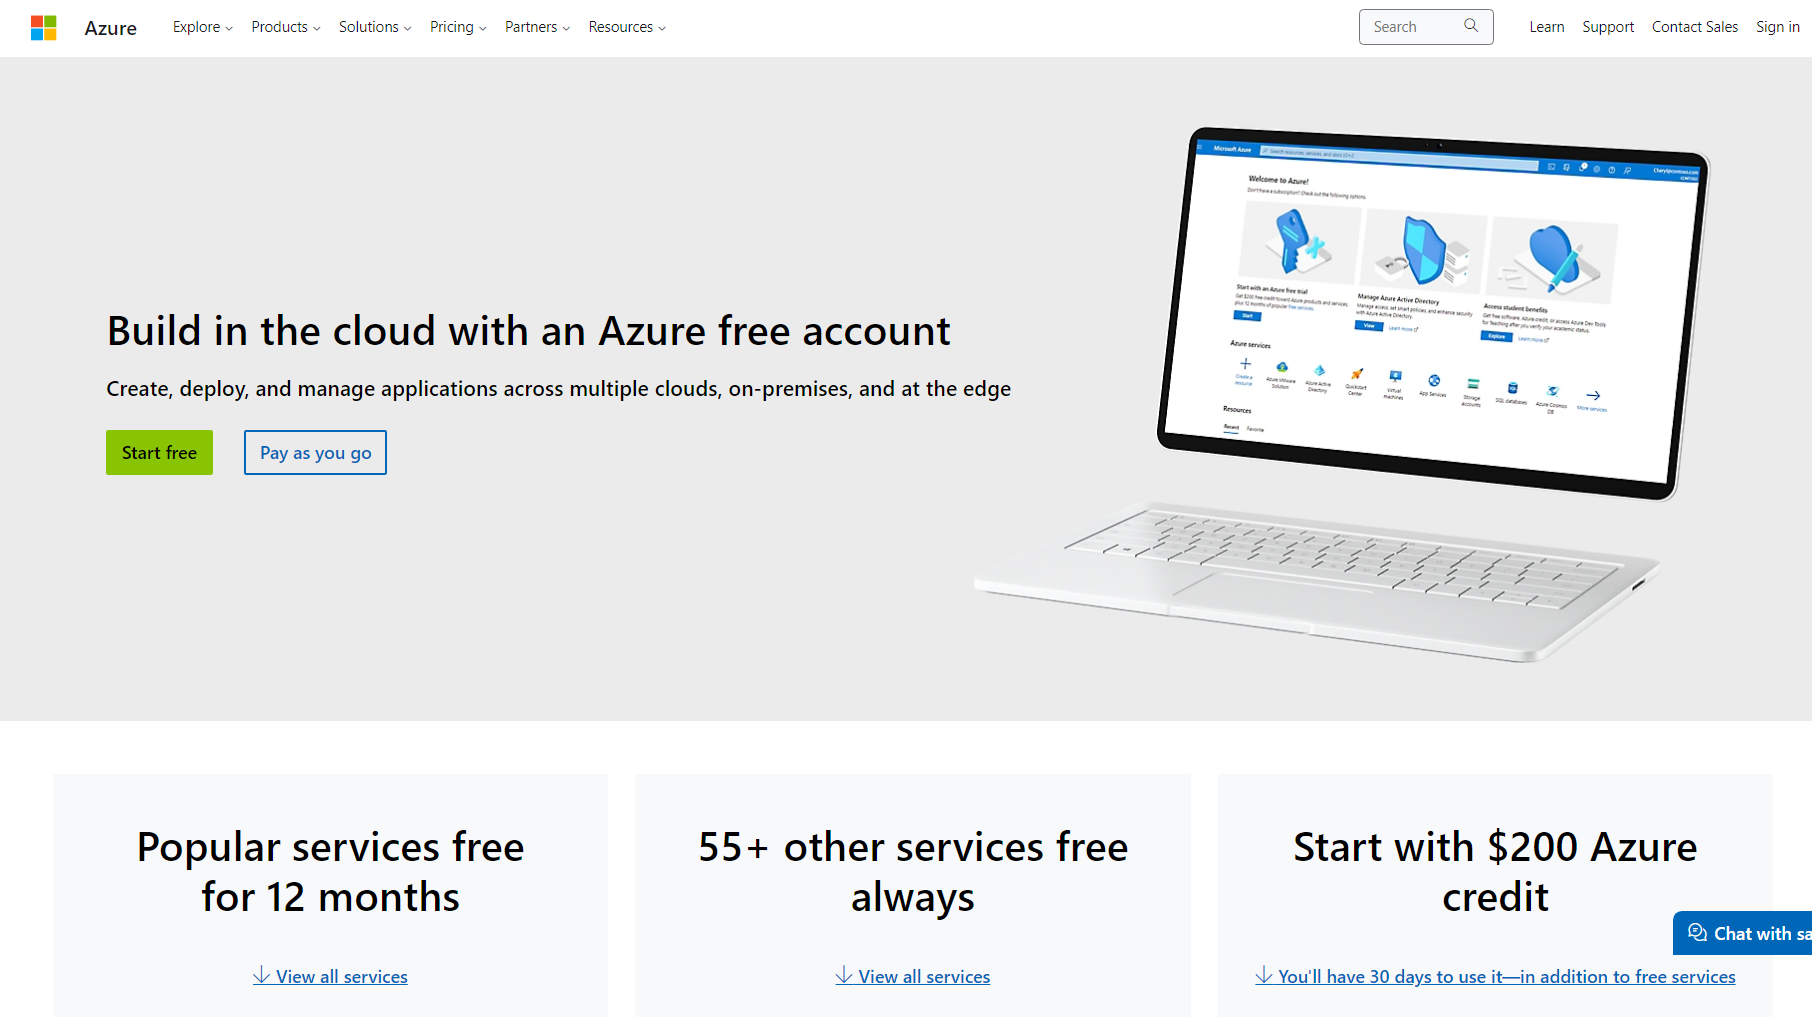
Select the “Start free” button to sign up to start using the free cloud services and an additional $200 credit towards the non-free cloud services. For verification you’ll need to provide a credit card. Microsoft will not charge you during this process.
NOTE: Throughout this lab, I will be (and you should too) starting and stopping my VMs constantly to avoid using unnecessary resources that come out of my free tier. When finished with your lab, I recommend STOPPING the virtual machines completely (I’ll show that later).
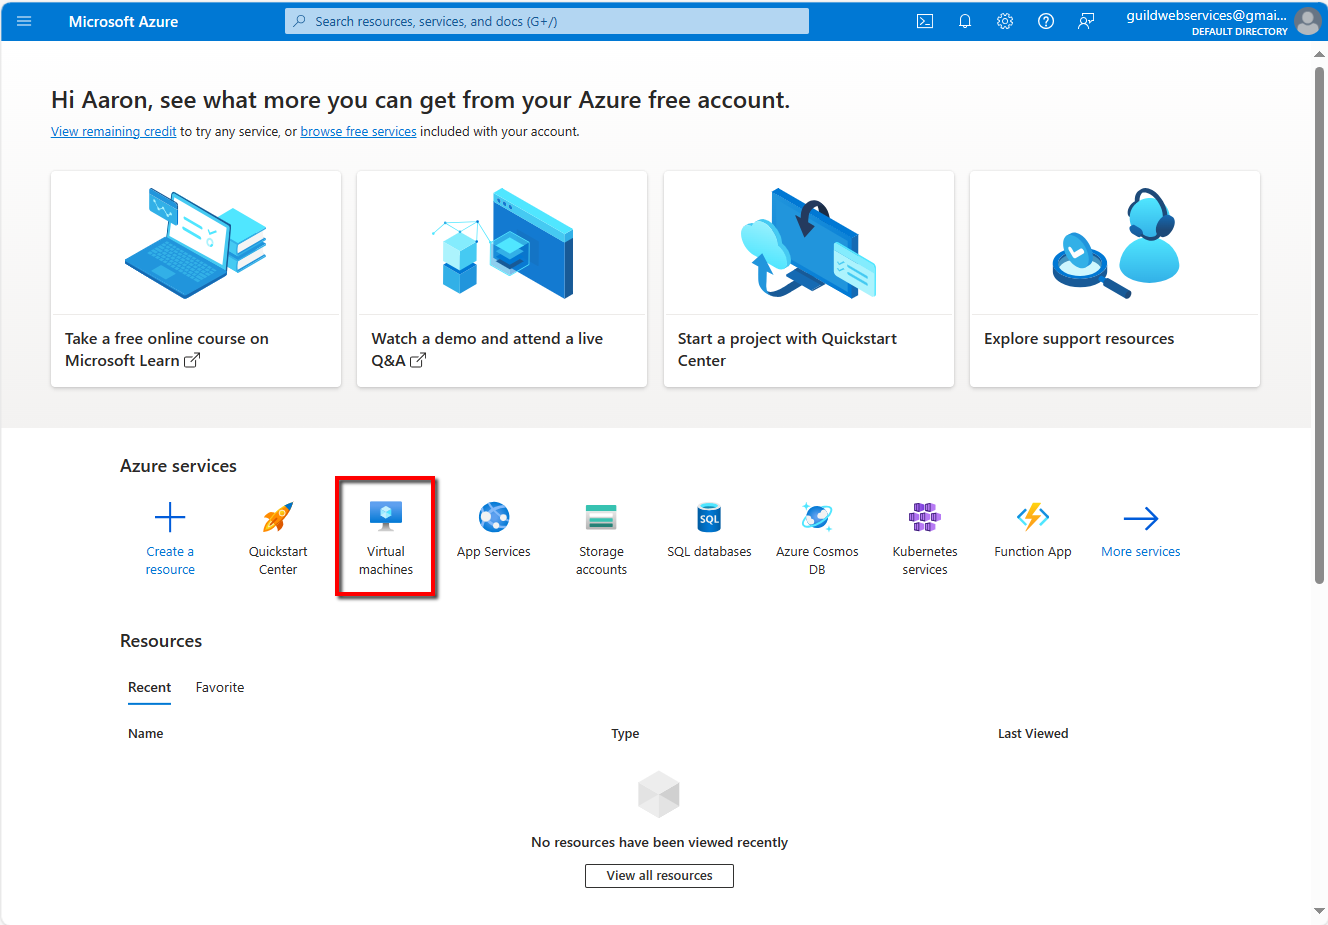
Alrighty then. After signing up, you will be directed to the Microsoft Azure Dashboard. From here select Virtual machines:
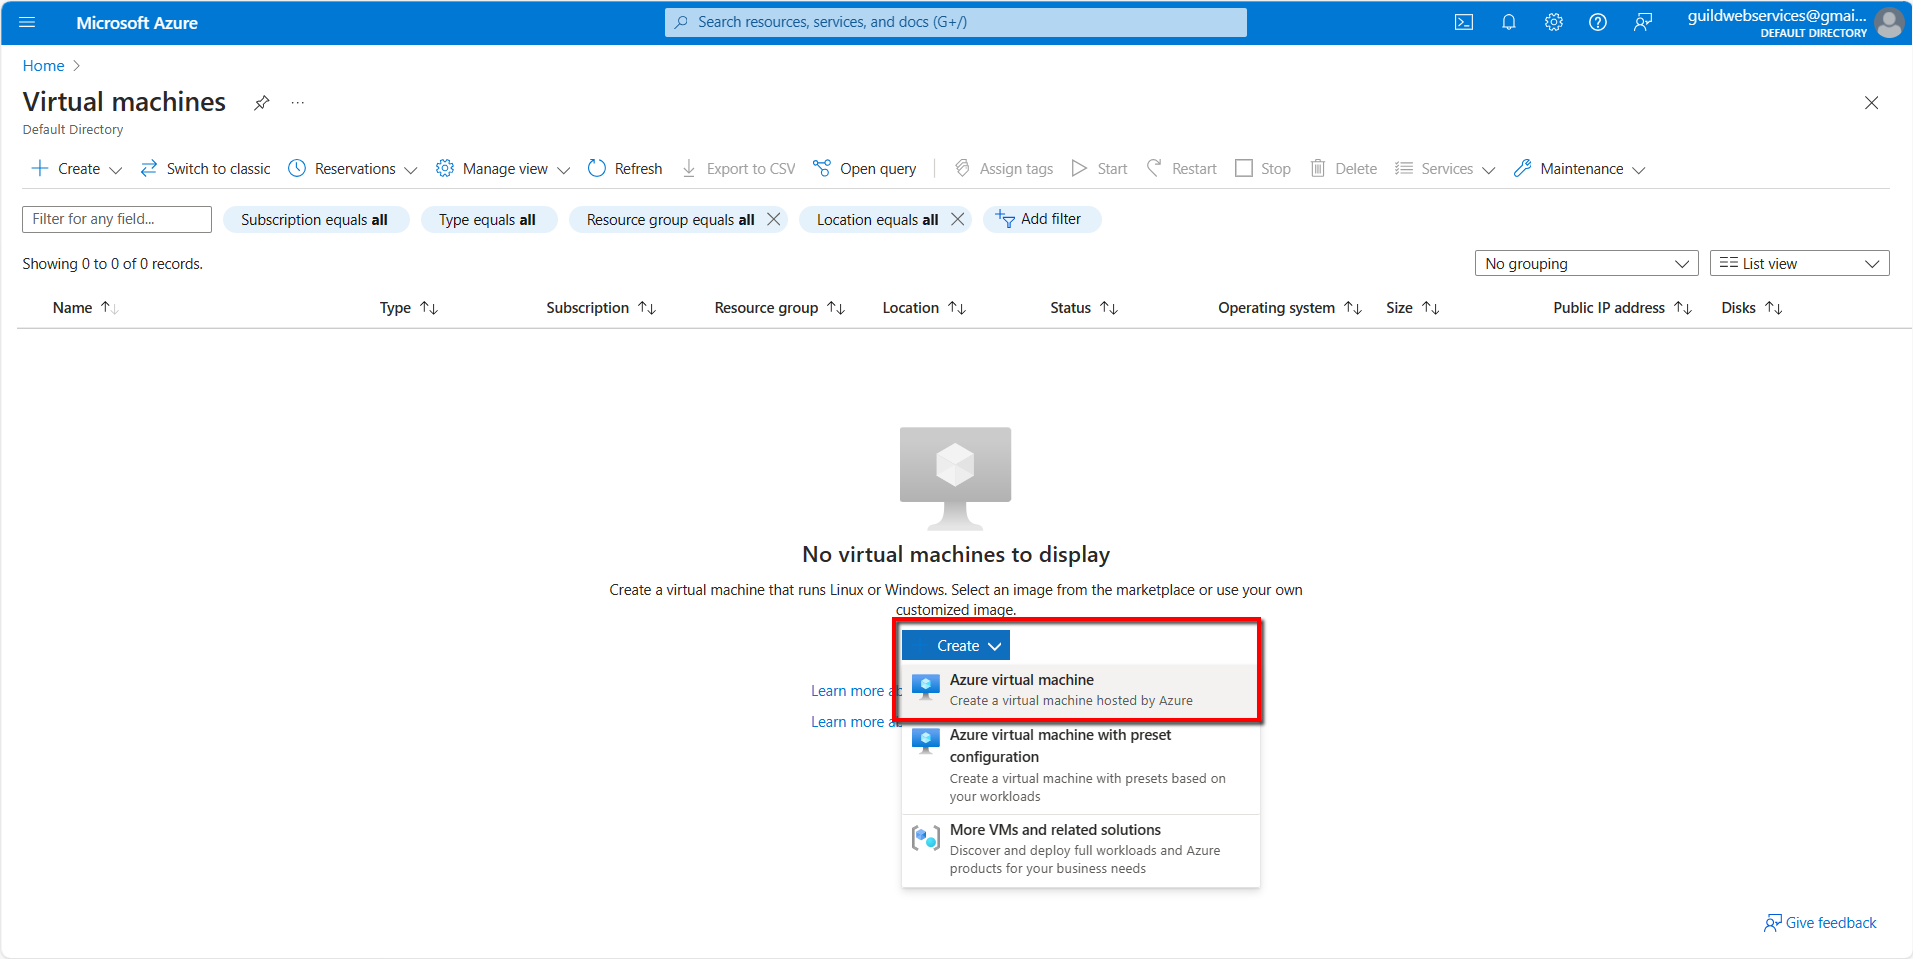
Next in the Virtual machines screen, select Create > Azure virtual machine:
Now you will be prompted to configure the virtual machine:
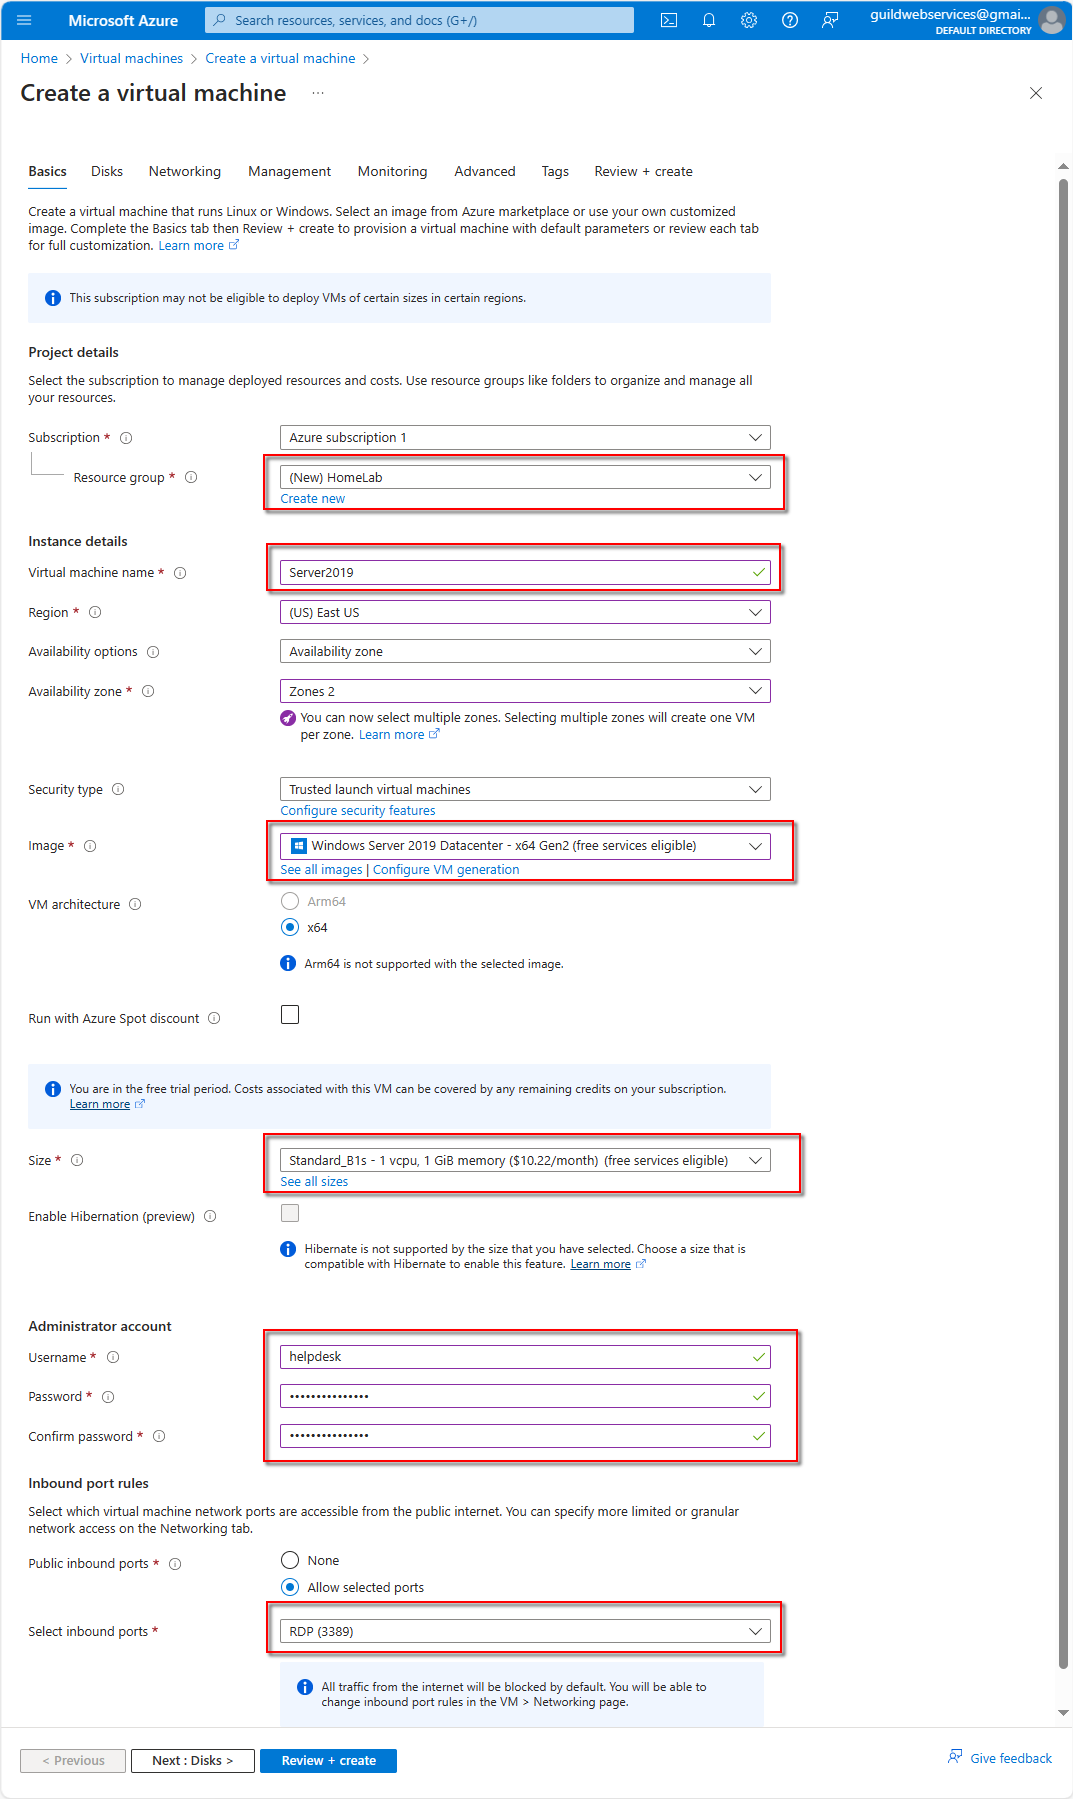
You need to create a new Resource group (a collection of resources that share the same lifecycle, permissions and policies). I called it HomeLab
Give the VM a Virtual machine name: Server2019
Choose and Image: Windows Server 2019 Datacenter -x64 Gen2 (free services eligible)
In Size field you can specify the amount of CPUs, memory, etc. Just leave it as the default (free services eligible)
Create a Username and Password for this VM.
Under Select inbound ports, I’m using Remote Desktop: RDP (3389)
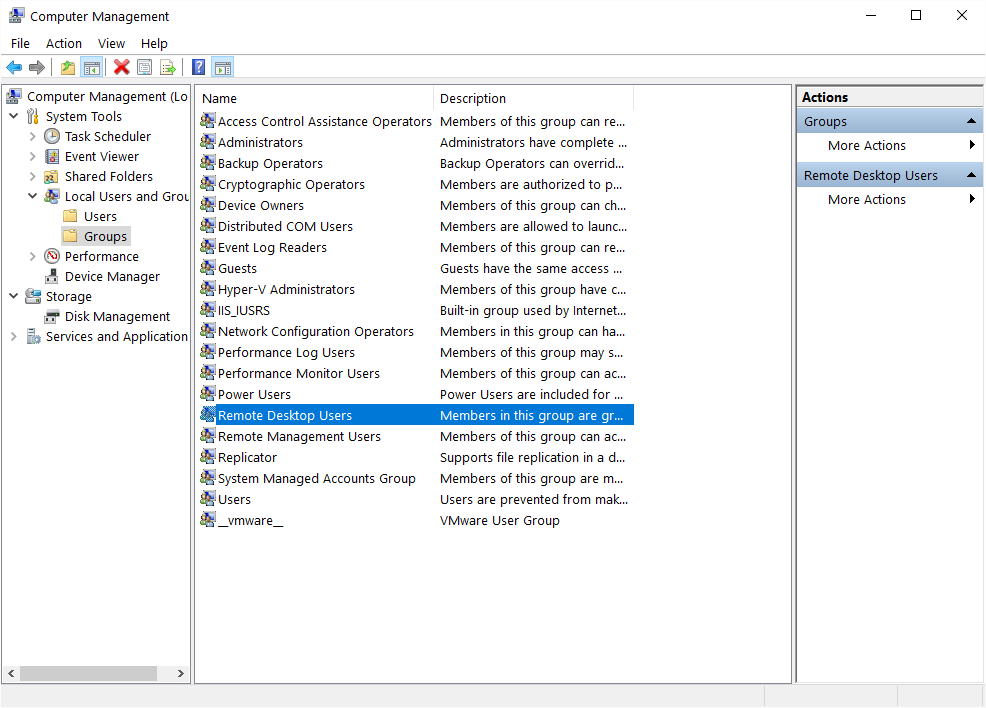
If you’re using RDP, make sure you to add your windows username to the allowed list of Remote Desktop Users in Computer Management (type “Computer Management” in Windows search bar > System Tools > Local Users and Groups > Remote Desktop Users)
Then select the blue Review + create button (you may get an error message stating that you cannot run a VM of this size in the selected zone. If so, just change the value in the Availability Zone field)

Now we’re on the Review + Create page (notice it tells you the price per hour to run this VM, as well as the Basics we’ve just configured). If everything looks good, go ahead and select the blue Create button at the bottom.
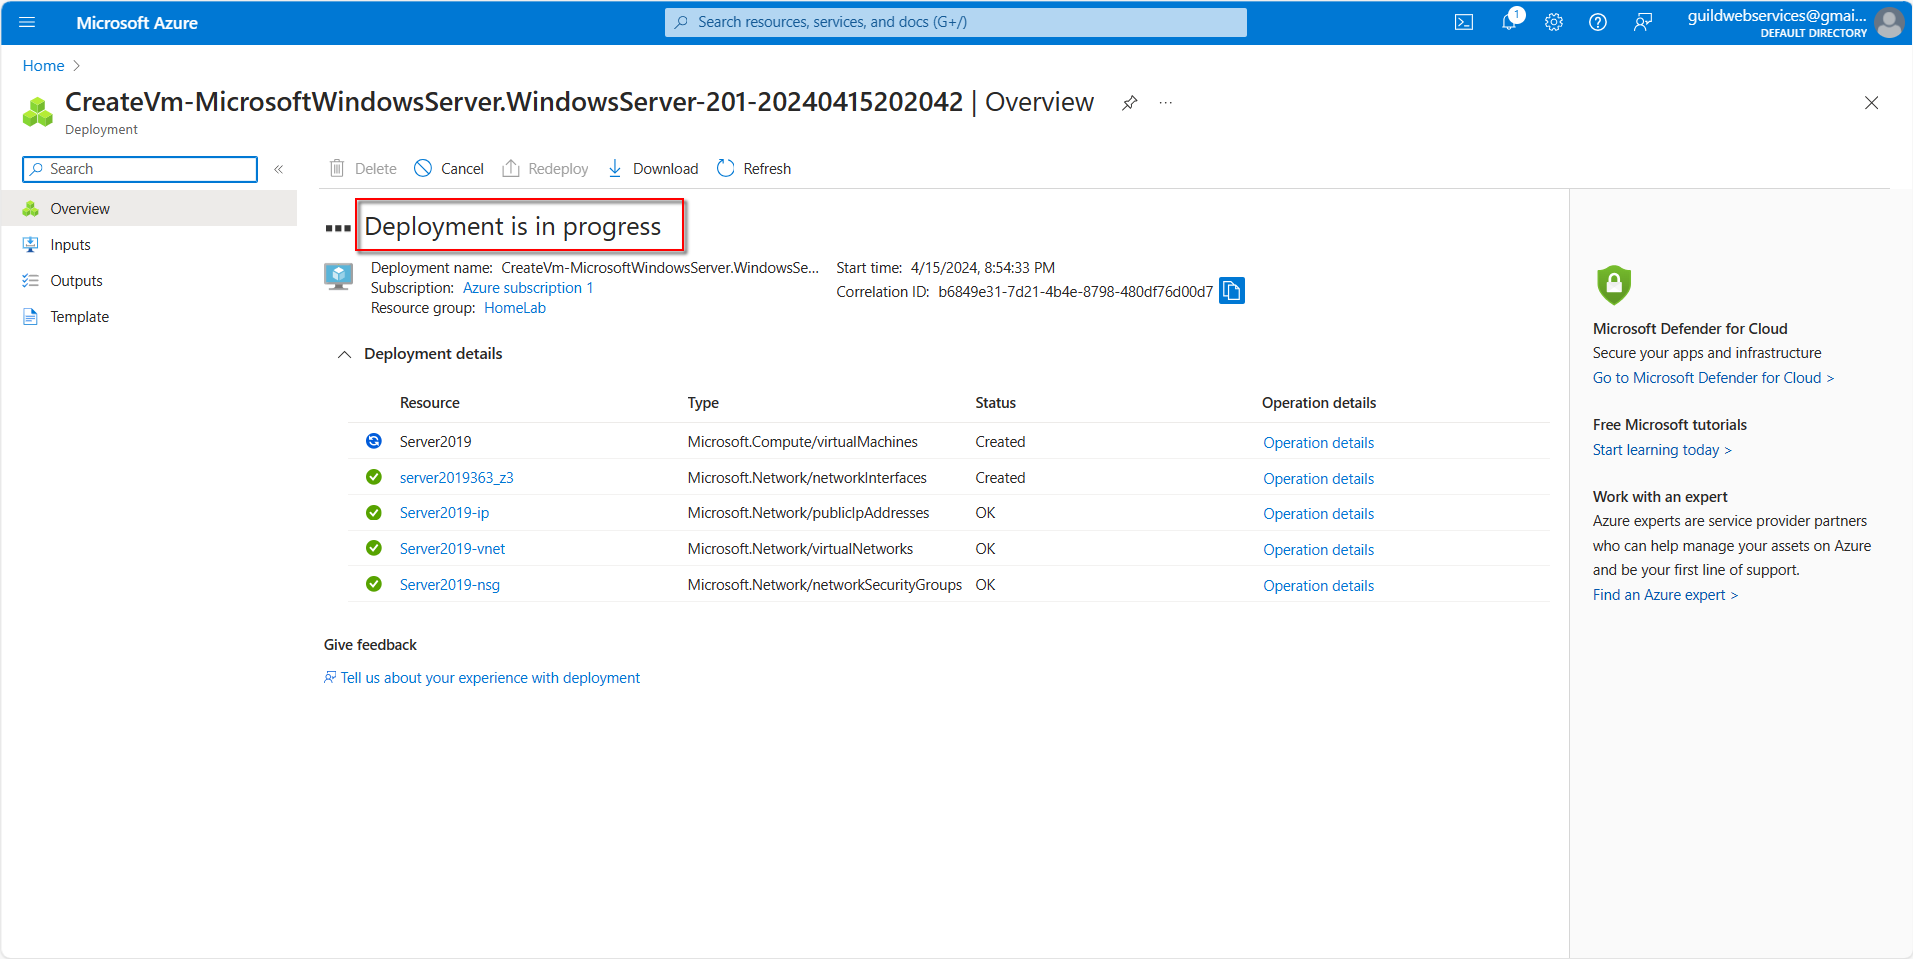
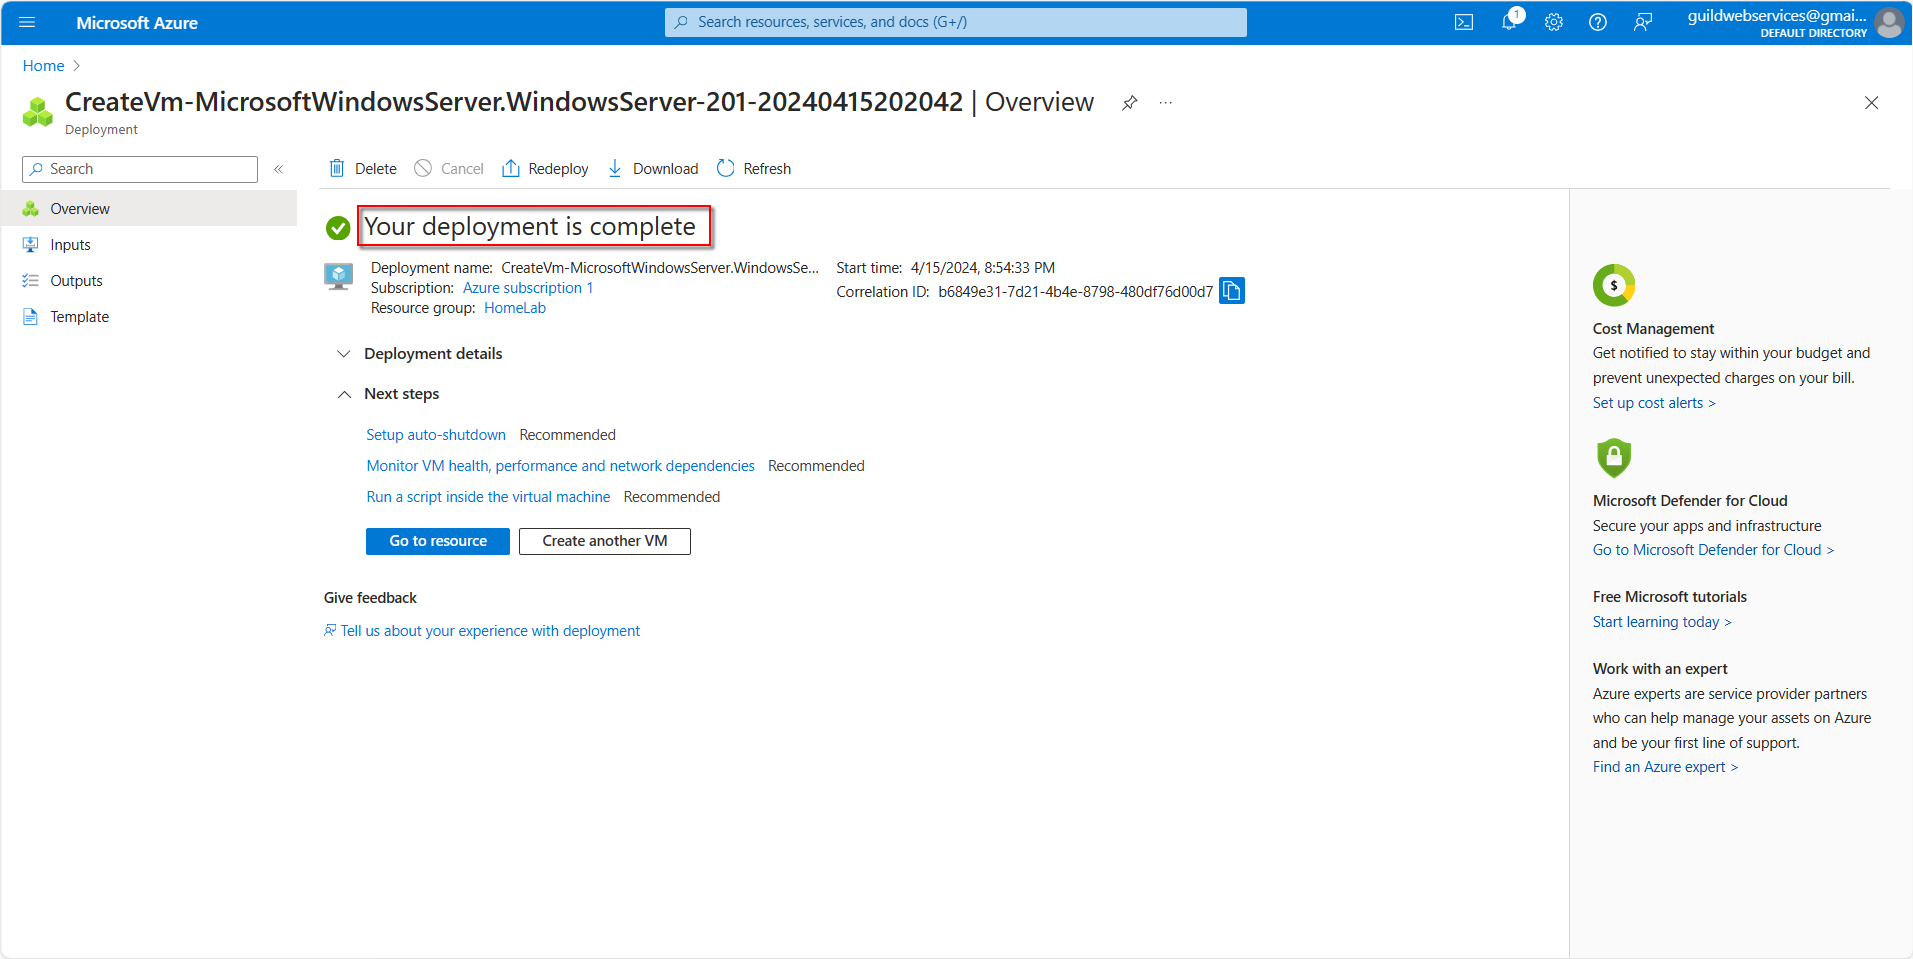
Azure will run several validation checks and if everything passes, you’ll see a Deployment is in progress message. Shortly after we see a new message, Your deployment is complete.
Now let’s create another VM from the Home screen by clicking Virtual Machines again:

On the Virtual machines screen select Create > Azure virtual machine (notice the vm we created earlier is displayed here):
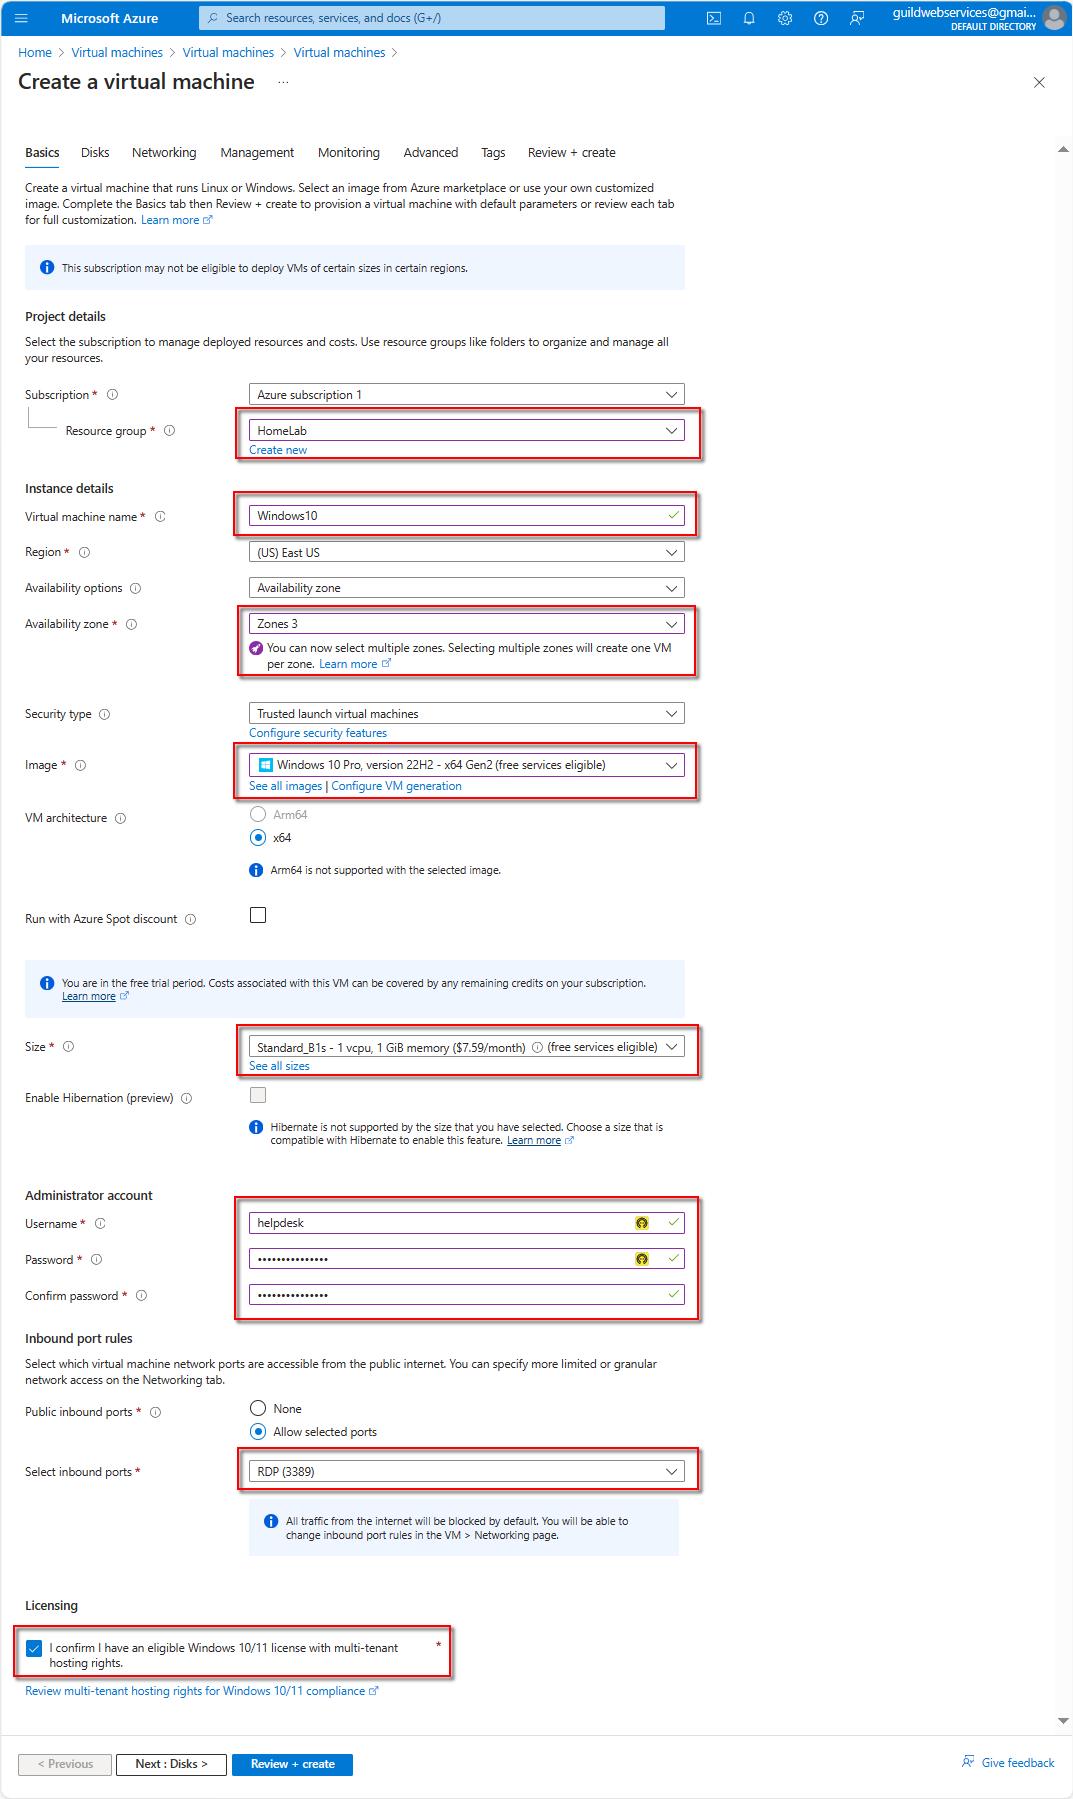
Now for the second VM, is used the following parameters:
- Resource group (same): HomeLab
- VM name: Windows10
- Availability zone: Zones 3
- Image: Windows 10 Pro
- Size: (default)
- Username/PW: Same as previous
- Inbound port: RDP (3389)
- Licensing: Check the box stating you have a valid license (I will show you how to get a free 30 day license)
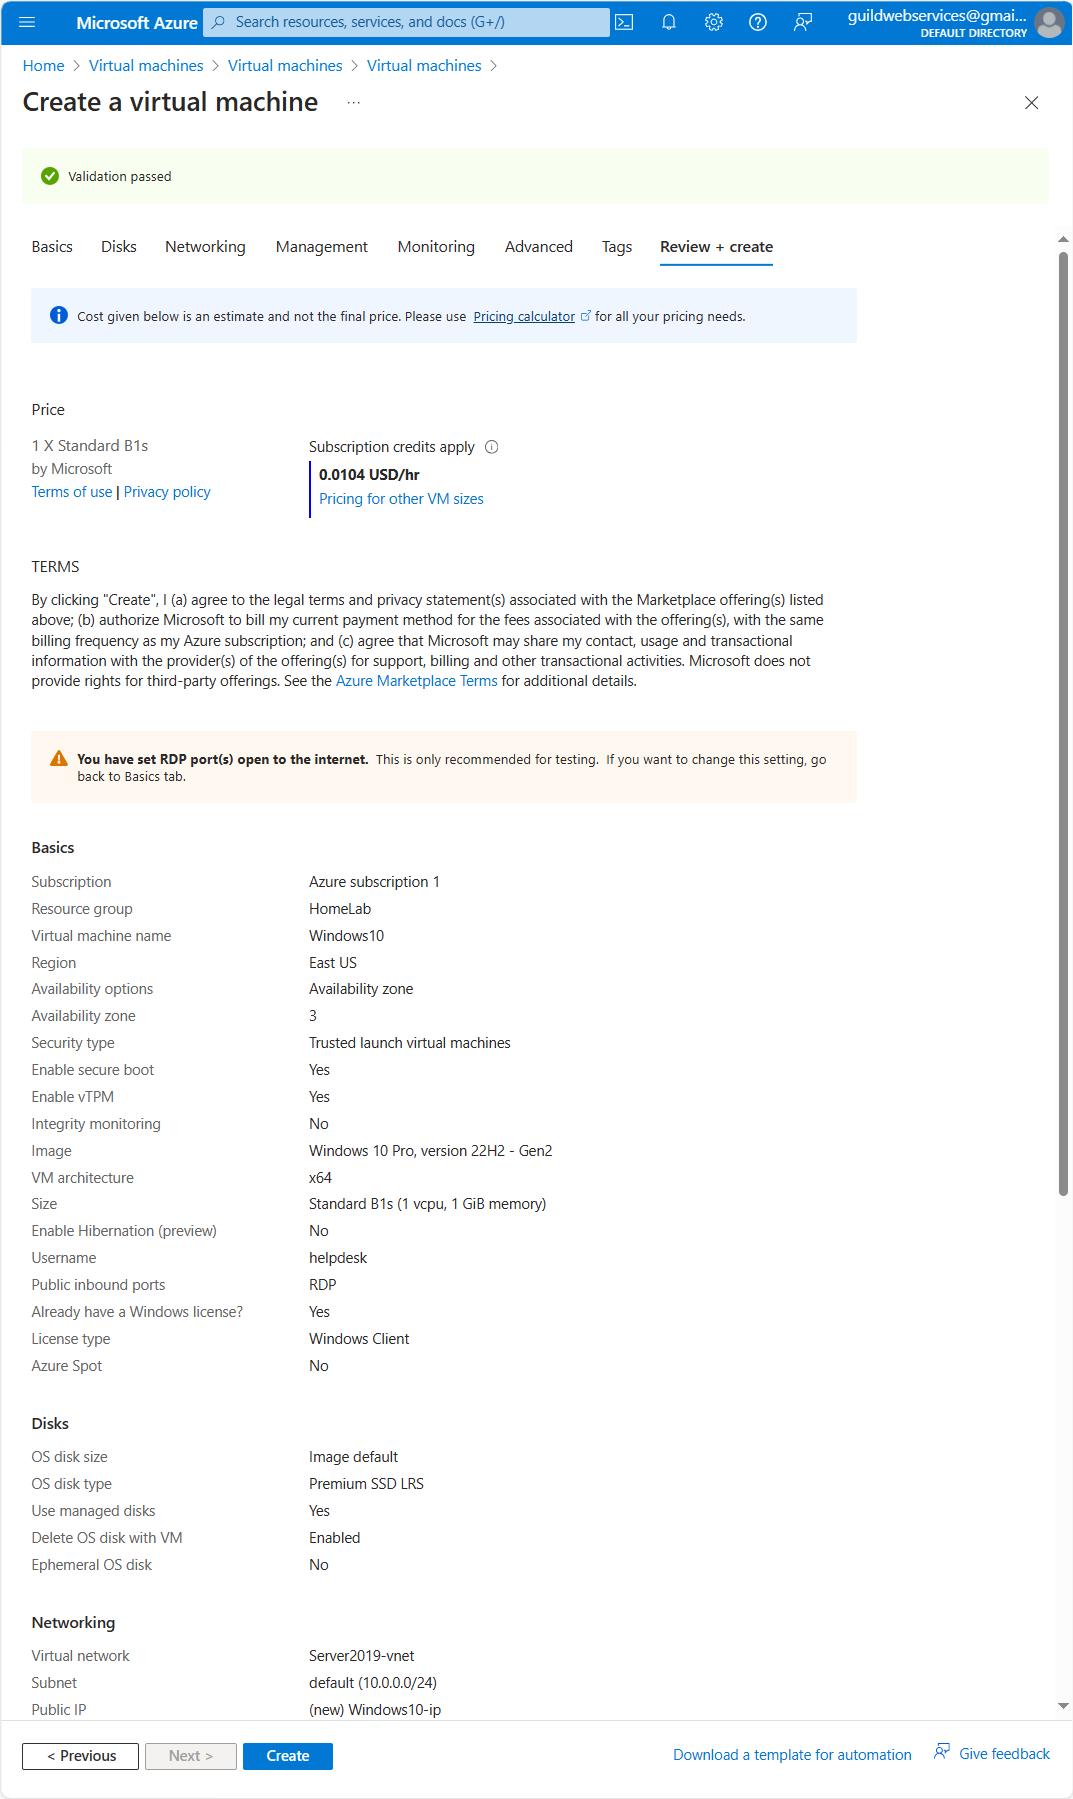
Click Review + create blue button:
The validation passed message will display on the top of your screen if the configuration has met Azure’s requirements. Go ahead and create:
Again, you’ll see the two deployment status messages (you can select the bell in the top right to view the progress in more detail):

Depending on your internet speed and the speed of the availability zone at the time, it could take anywhere from 30 seconds to 3 minutes for the VM deployment to complete:

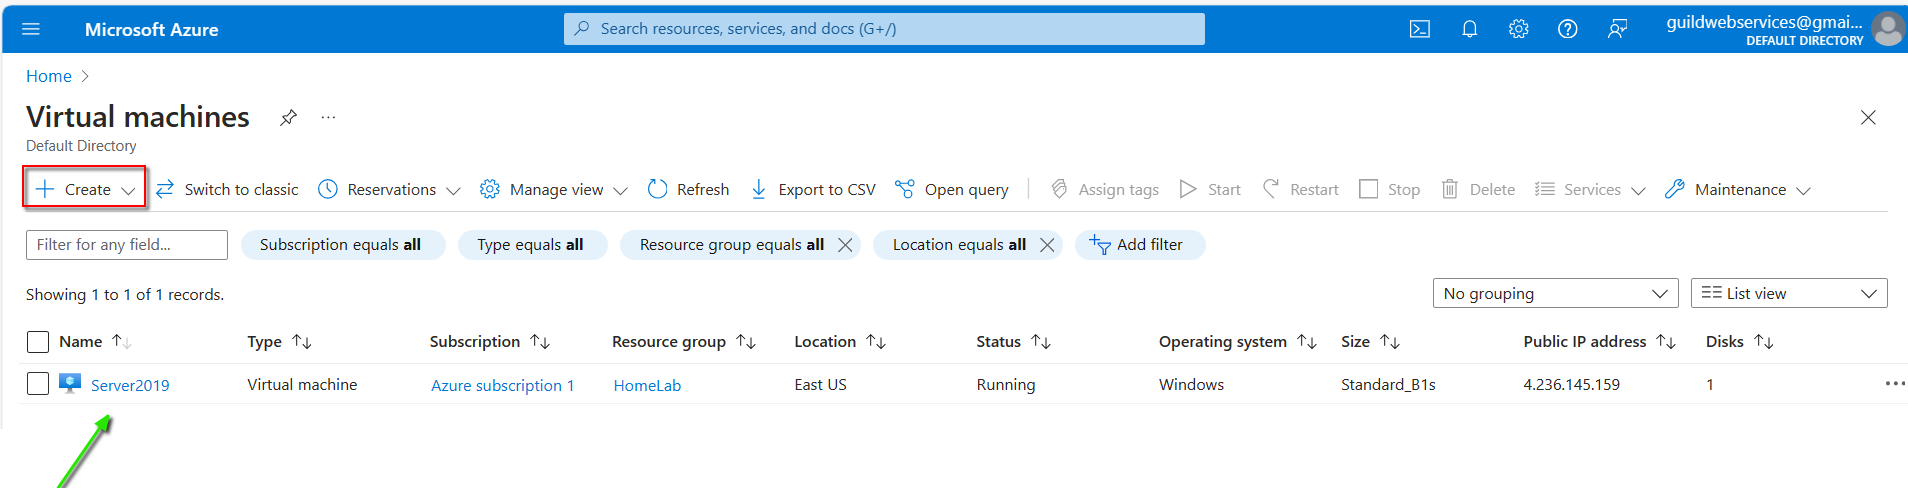
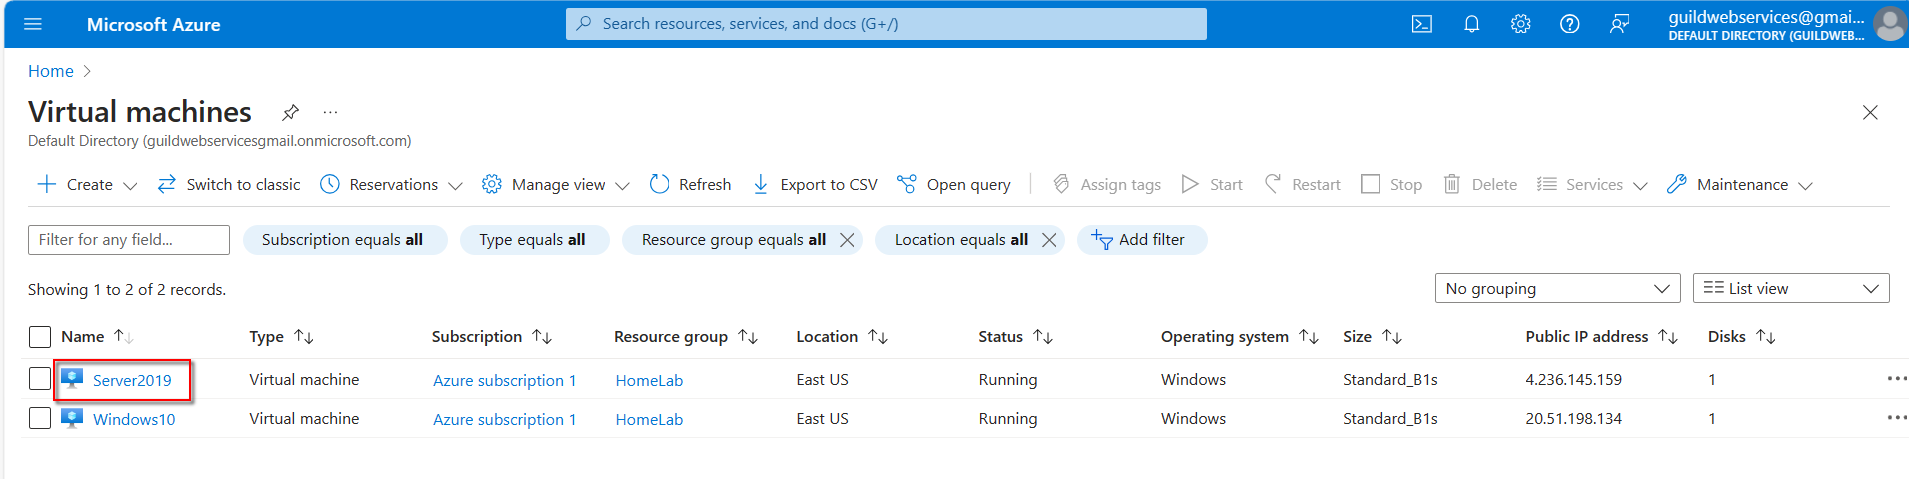
Next, navigate to the Home screen and go back into Virtual machines again and select the first VM we created (Server2019):
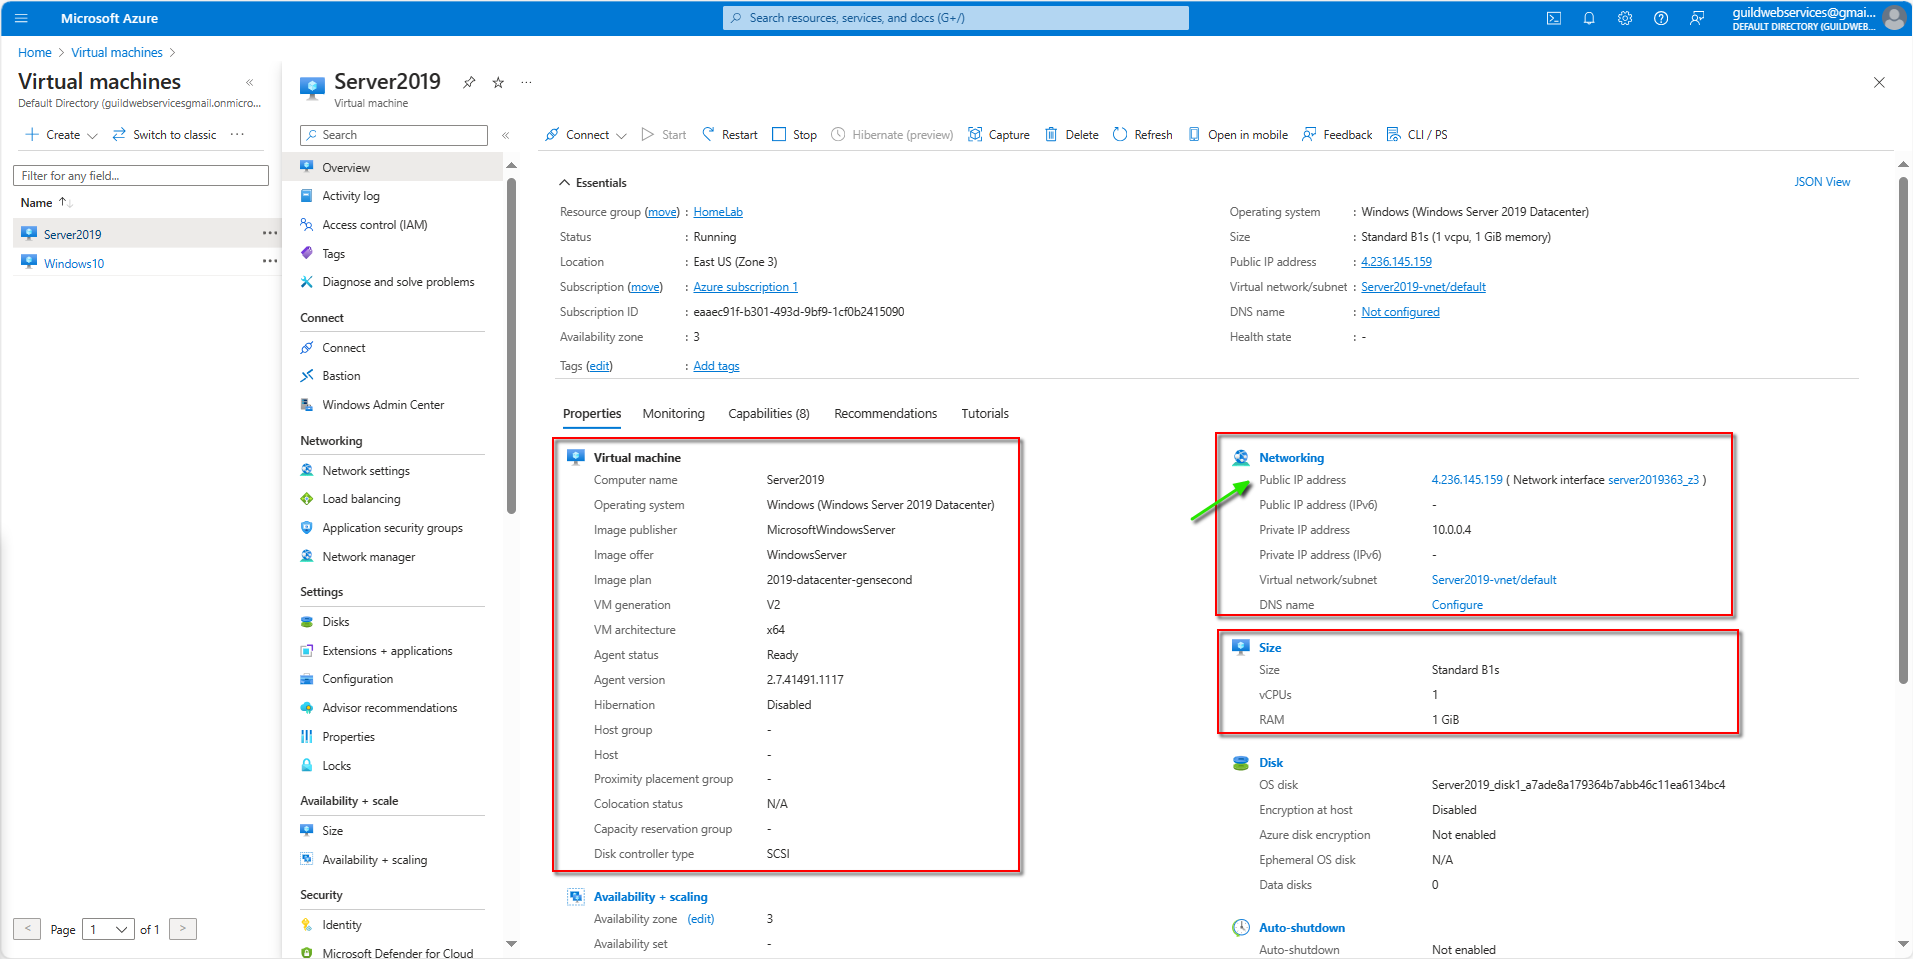
This will bring us to the Overview of the Server2019 vm where you’ll see all settings (VM name and OS, Public IP address, Size of resources, etc…) that are configured on this vm:
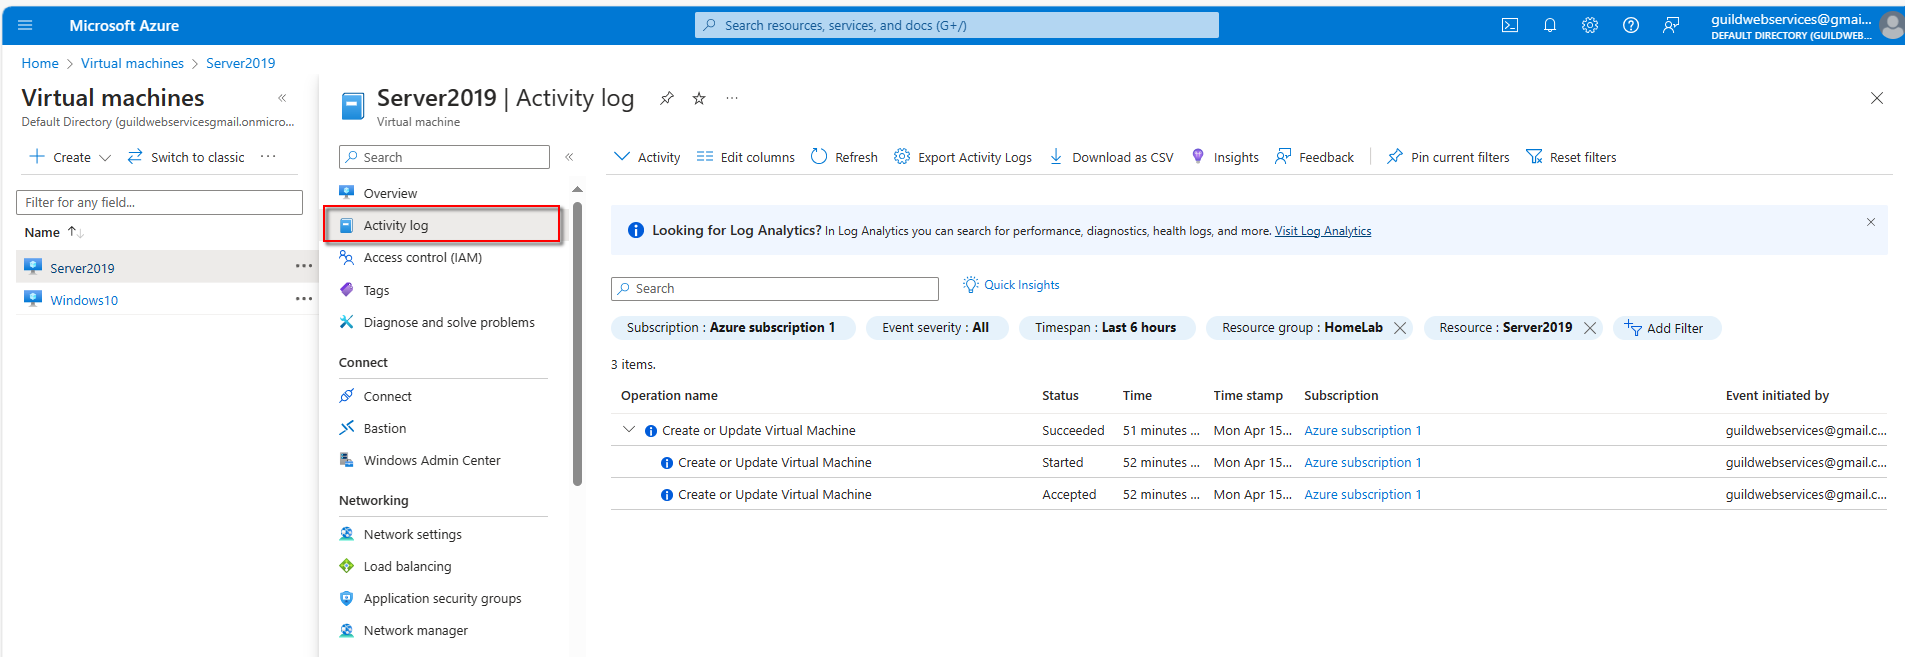
Activity log: on this tab you can create an Activity Log and filter for different events such as: monitoring what users are doing on the vm, system and health events, and much more:
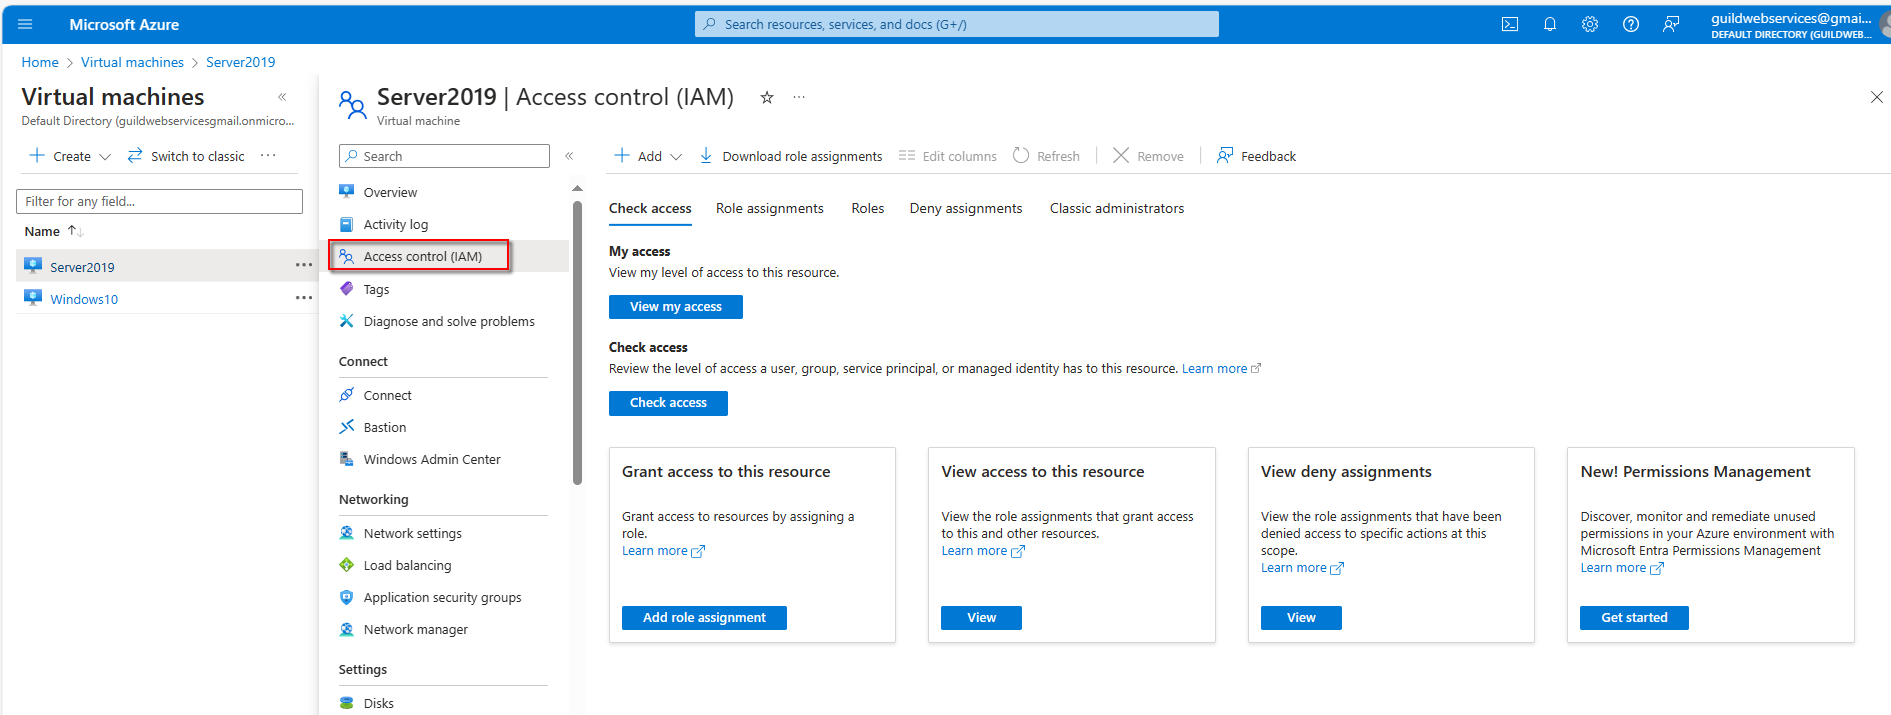
Access control (IAM): this tab allows you to grant access and assign roles to users:
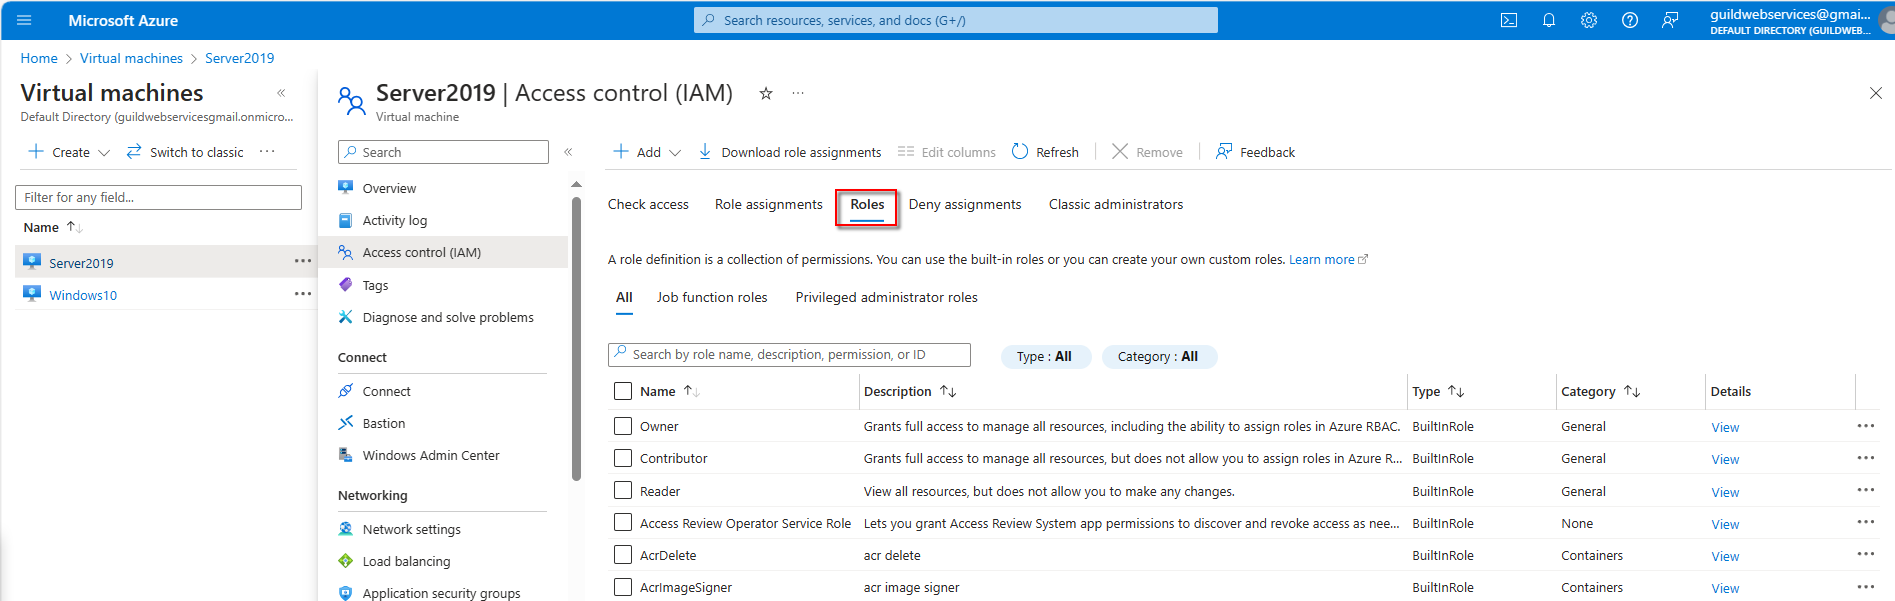
I’m not going to go over all of the tabs but some notable tabs are:
Diagnose and solve problems: if you have some weird issues going on in your VM you can resolve them here.
Networking Settings: you could create an inbound outbound rule.
Connect: used to remote into this machine which we’re going to do shortly.
Disk: you could increase the disk size as needed if you need to.
Size: you could update the memory of the RAM on this if you need to.
Microsoft Defender for Cloud: used for discovering threats and removing malicious software and viruses.
Backup: used for backing up the vm.
Reset password: a common use here is if you’ve forgotten your password or locked out of your account.

Server2019 VM:
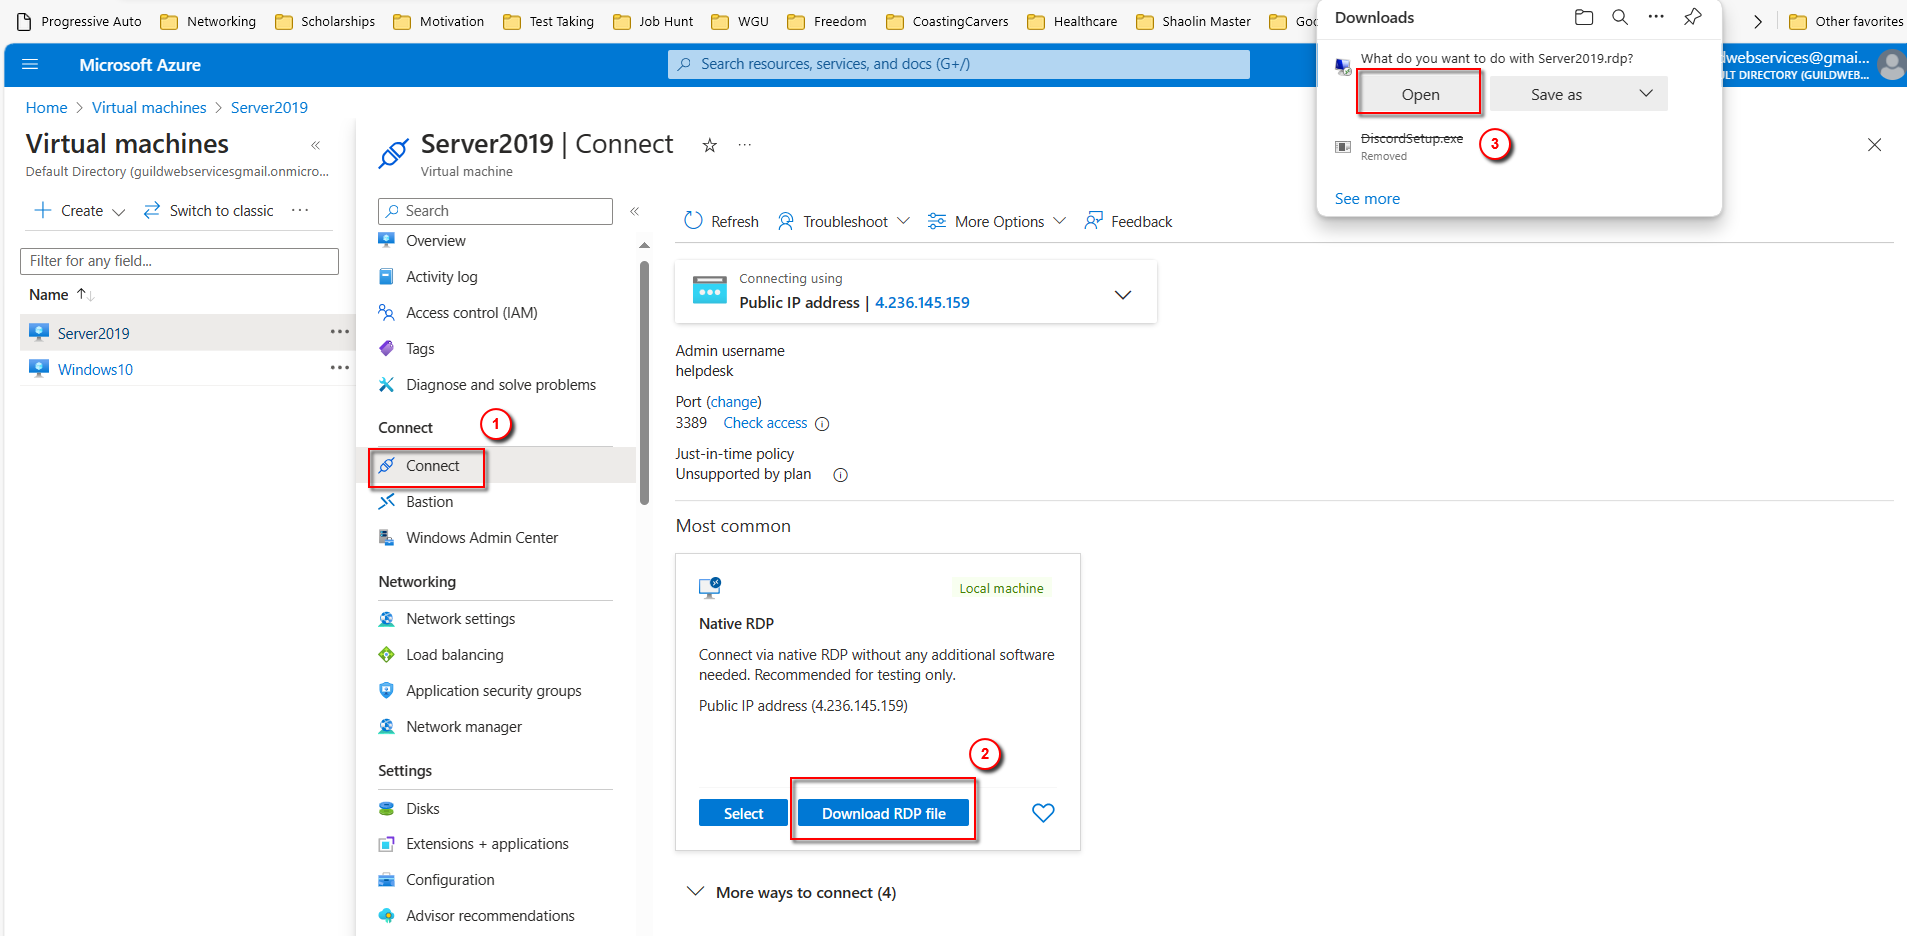
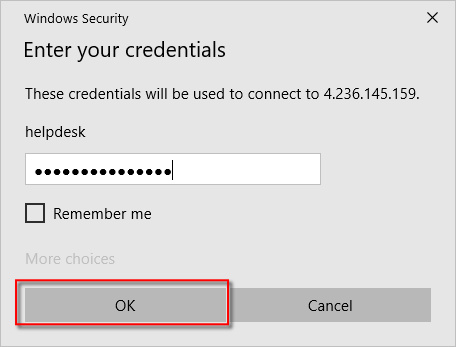
Now let’s actually connect to our Server2019 VM by going to Connect, Download RDP file and Open:
Then Connect:

It will prompt you for your password then hit OK:
Hit Yes when it says identity cannot be verified:

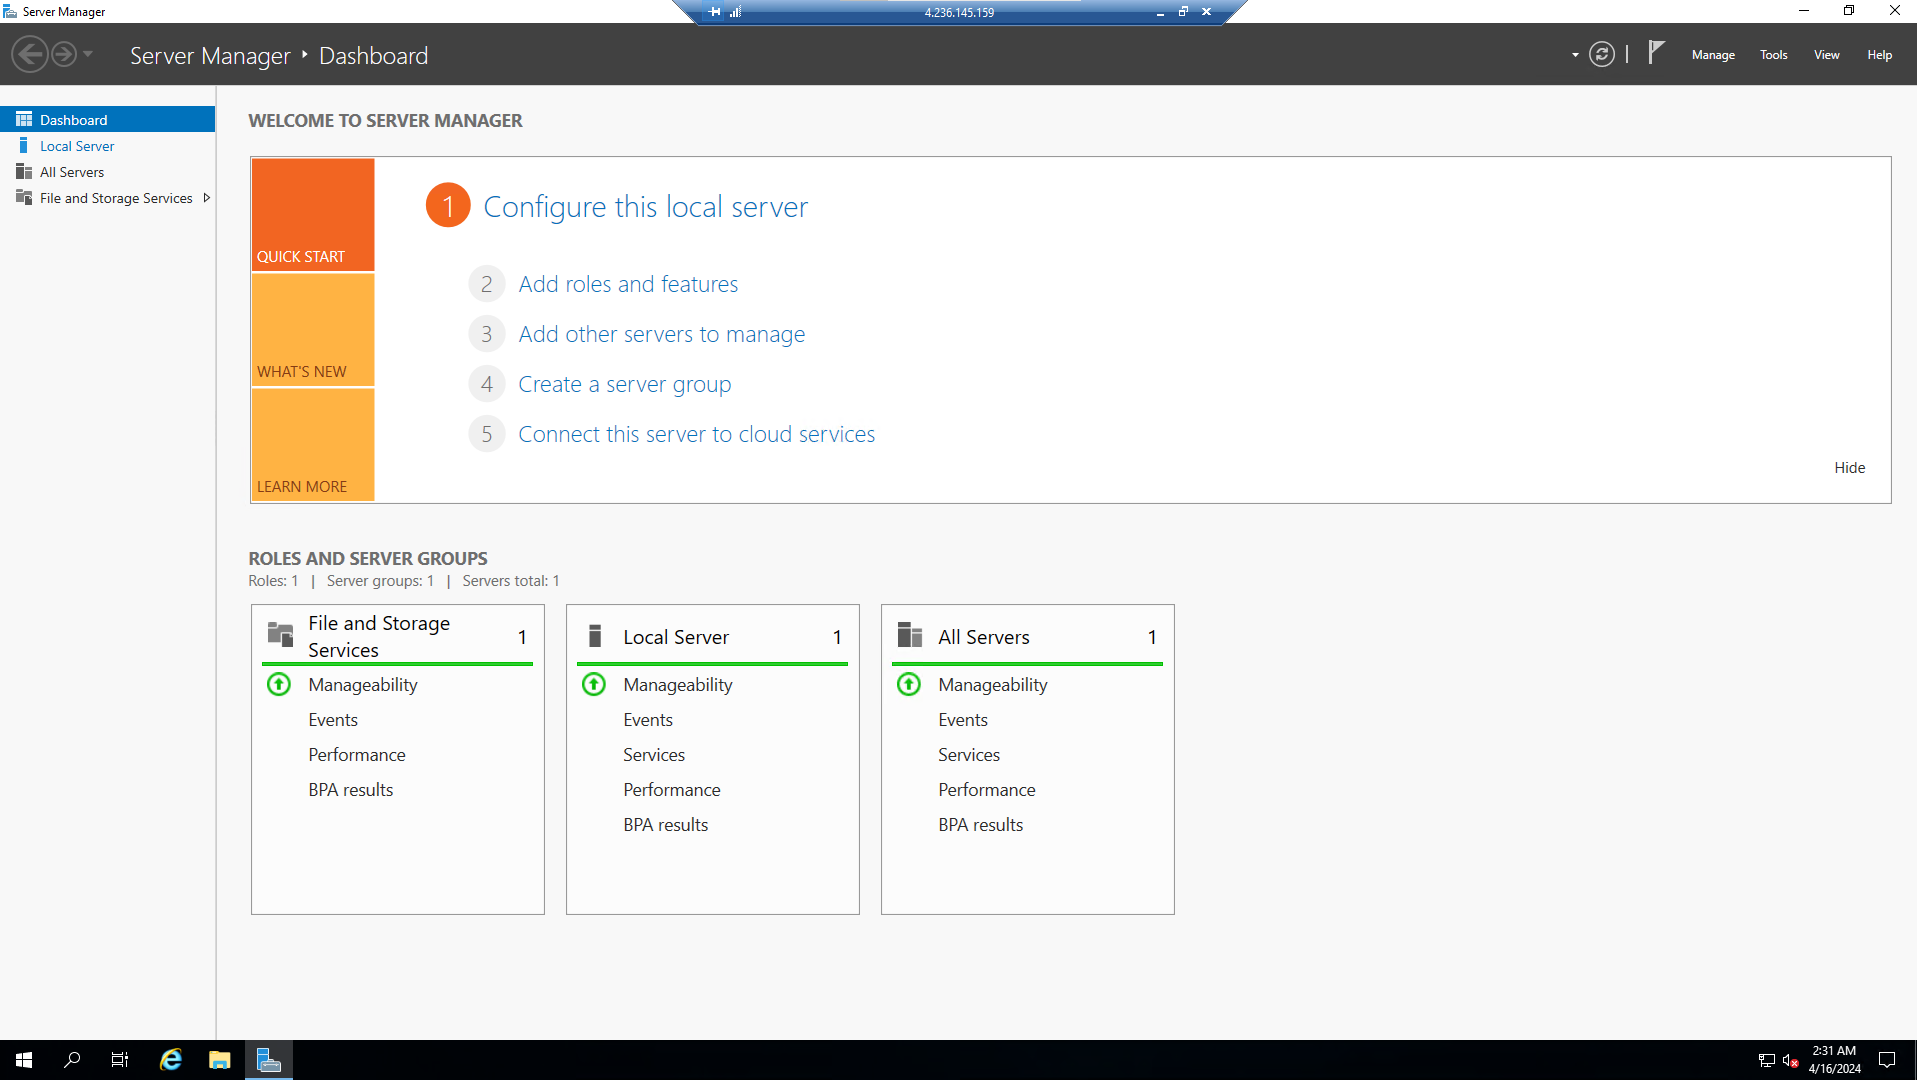
It will then start loading the VM and go through the basic setup configurations.
Now you should see the Server Manager Dashboard:
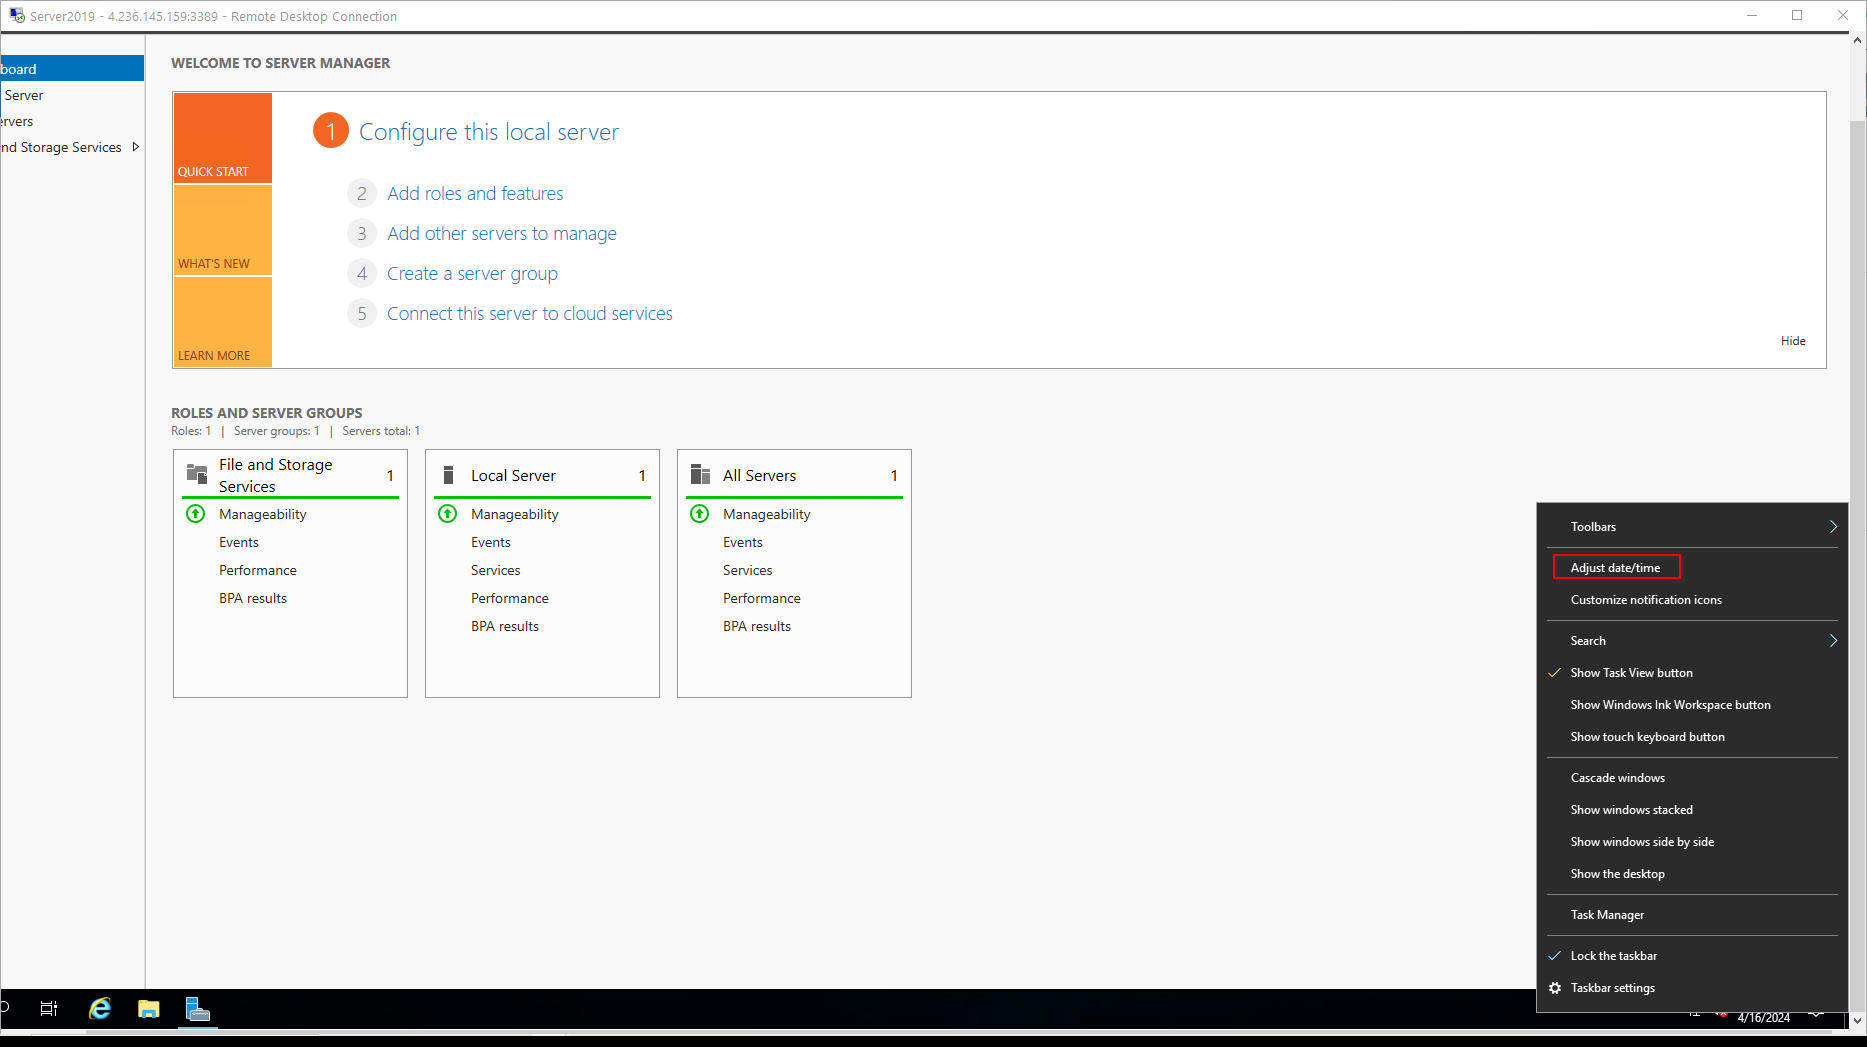
First thing I’ll do is change the date/time to my local time so there’s no confussion down the line (right click on the date/time at bottom-right of VM screen and select Adjust date/time:
Then select your local timezone:

Next I’ll rename this server from Server2019 to Miami-01 (File Manager > right-click on This PC > Properties > Change settings > Change > enter new Computer name > OK):
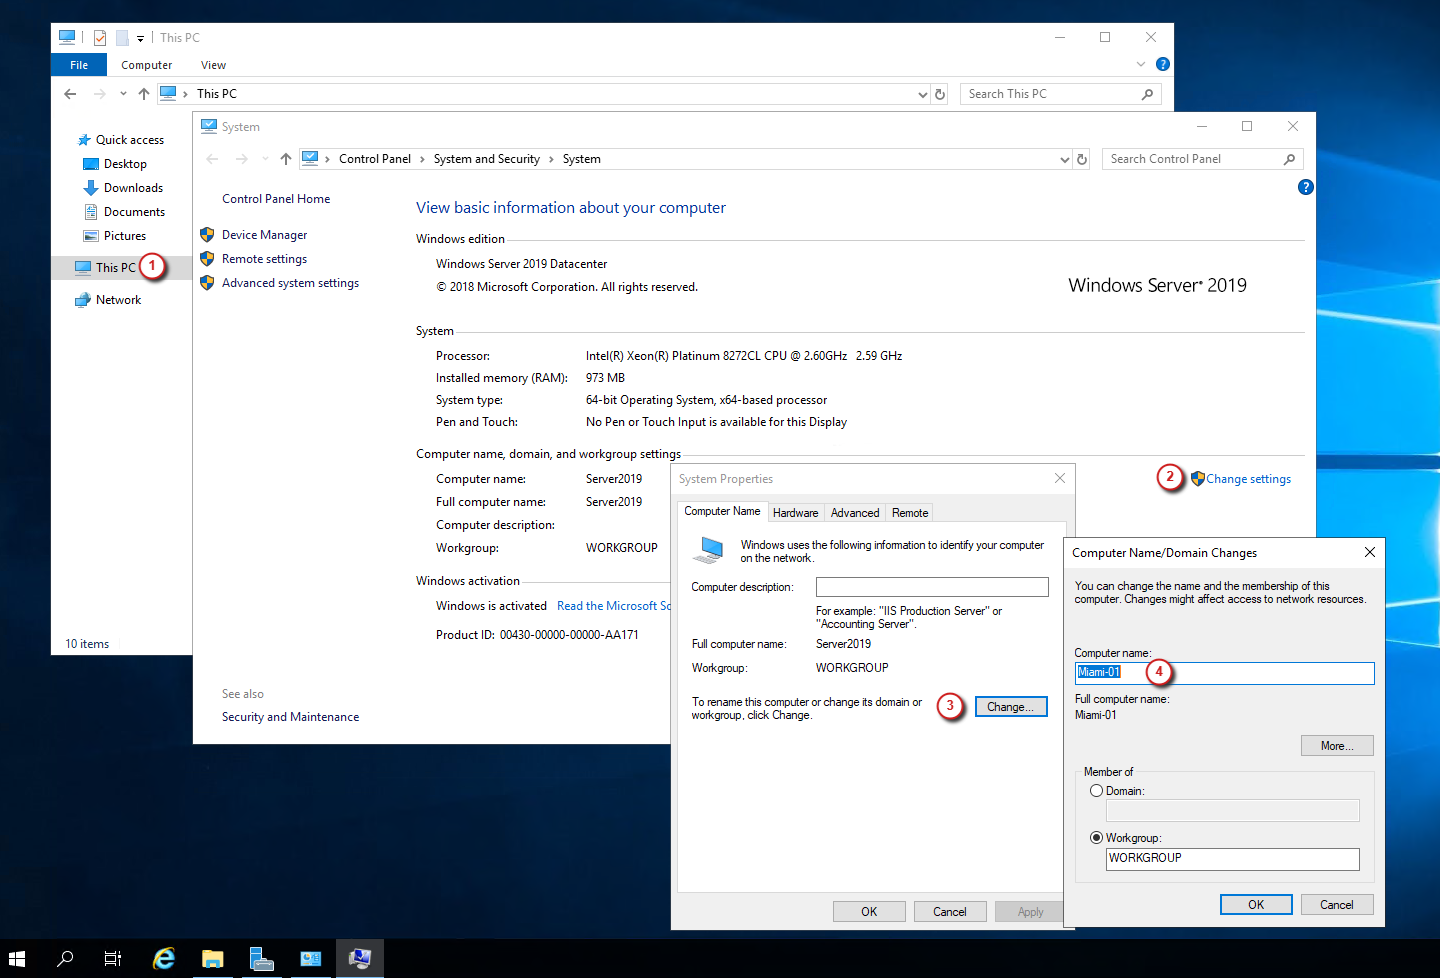
Then click OK > Restart Now (VM will disconnect and you’ll need to RDP back in):

Note: I could’ve changed the name of this PC (Server2019) in the initial Azure VM configuration, but knowing how to rename a PC is a basic skill everyone in IT should know how to do.
Windows10 VM
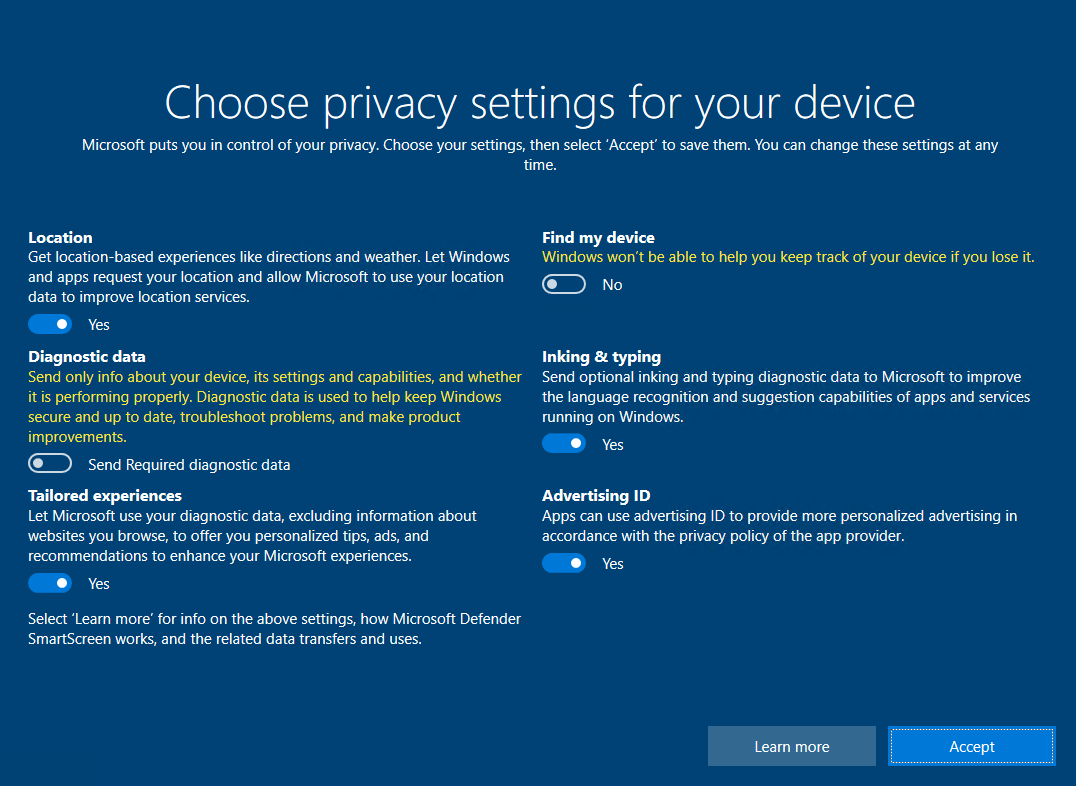
While that’s restarting, I’ll go ahead and connect to the Windows10 VM for the first time by following the exact same process as connecting to the Server2019 VM (download the RDP file > open > enter credentials). Hit “Accept” for Privacy Settings on the Windows10 VM:
Repeat the updating the correct date/time process as well as renaming this VM from Windows10 to Desktop-01. Restart the VM to apply.
Miami-01:
Reconnect to Miami-01 via rdp.
Once connected, let’s verify the name change by opening the command prompt and issuing the command: whoami /user

Notice the green arrow pointing to the new pc name of miami-01:

So we are good to go with this VM and go ahead and sign out. This will bring you back to the Azure dashboard.
Select Virtual machines > check the box to the left of Name to select all > Stop both VMs:
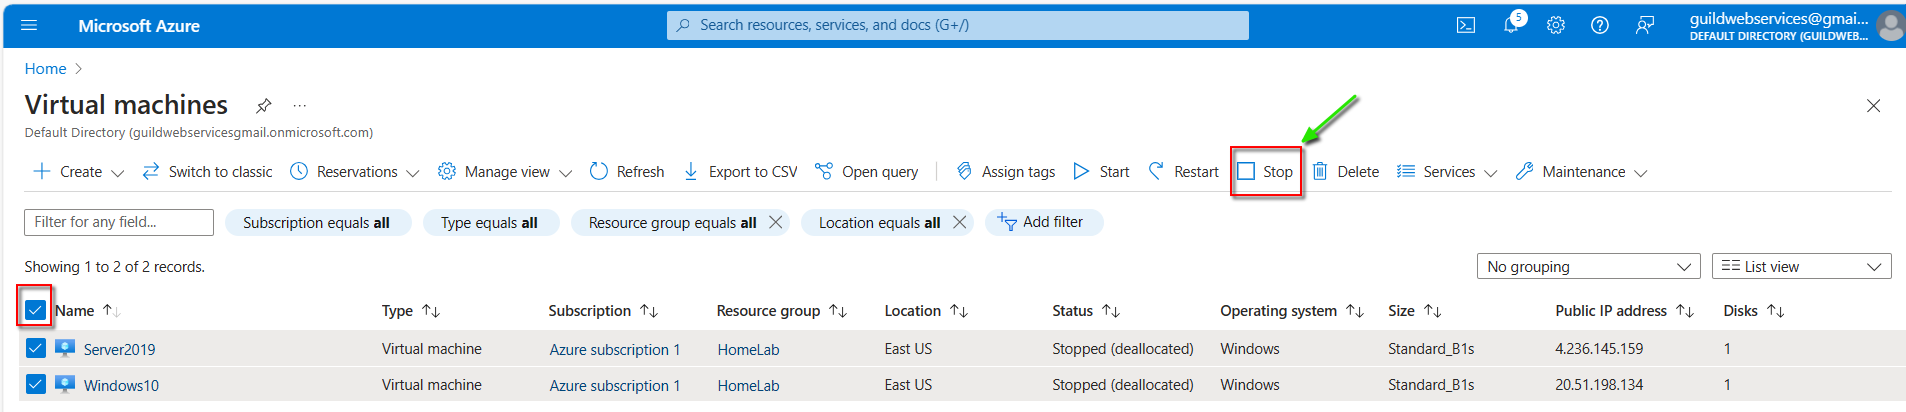
Note: I’m starting and stopping these VMs a lot because we don’t want to be charged for a VM running while we are not using it.
When you’re ready, continue on to Part 2
MAKE SURE TO STOP YOUR VIRTUAL MACHINE!