
Archive
SSH Configuration on a Cisco Switch
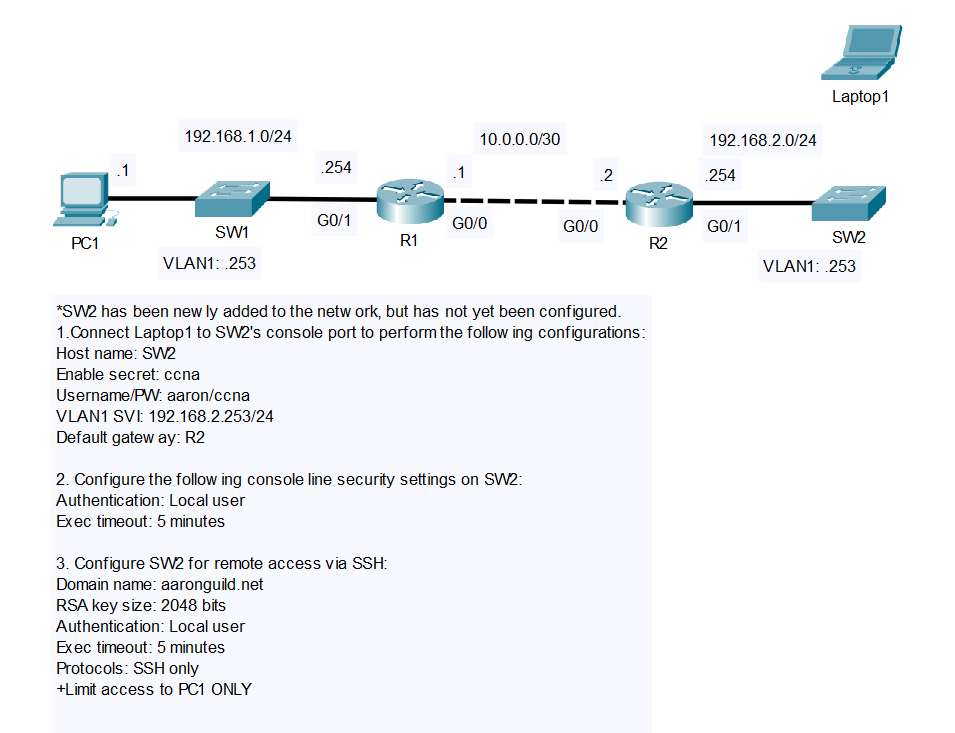
In this lab, we’ll configure SSH on a Cisco switch for remote access. SSH (Secure Shell) is a cryptographic network protocol that ensures secure communication over an otherwise unsecured network. SSH was designed to replace insecure protocols like Telnet and other remote Unix shell protocols. You can follow along by downloading this SSH Config Packet Tracer File and opening it in Cisco’s Free Packet Tracer Simulator (create a free account, enroll in one of the free courses and download the free software).
First we need to connect Laptop1 to SW2 via a console cable:

Now make the connection by clicking on Laptop1 and selecting the RS 232 port:
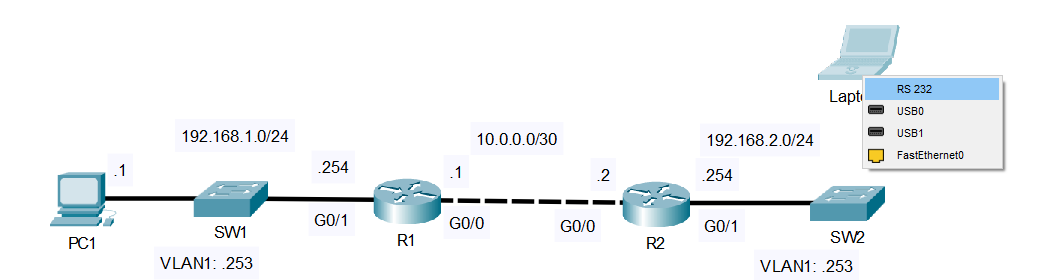
Nex click on SW2 and select the Console port:

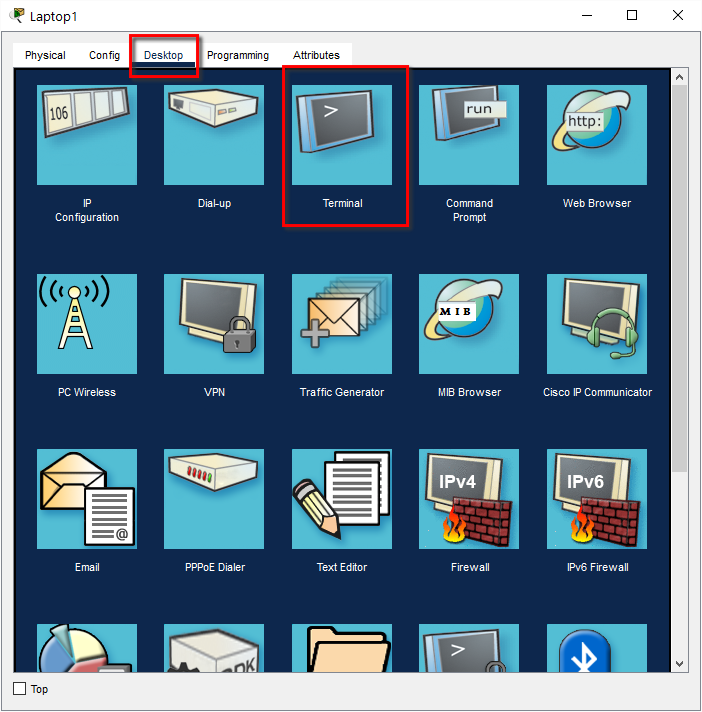
Click on Laptop1 and open the Desktop tab. From there open the Terminal connection:
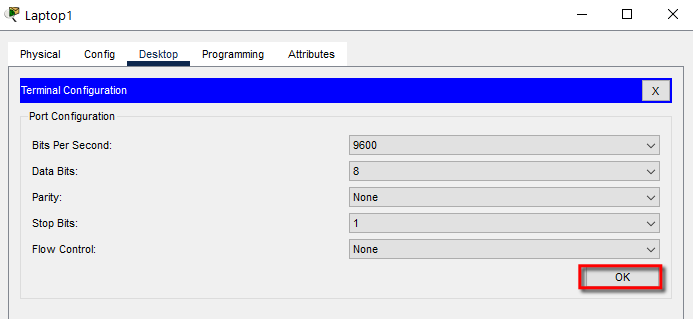
Leave the Terminal Configuration screen at their defaults and hit OK:
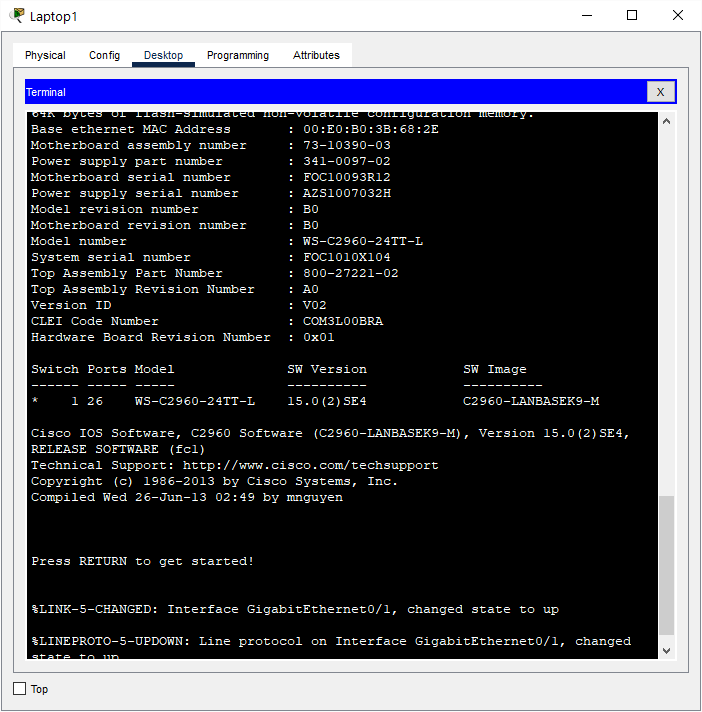
If you’ve followed the previous steps correctly, you should see information about SW2:
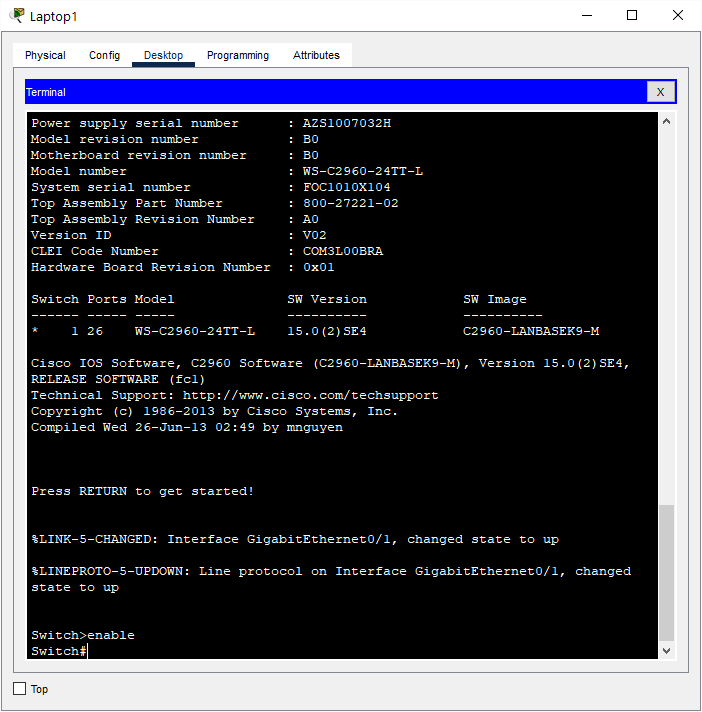
Click in the Terminal > press Enter > issue the enable command:
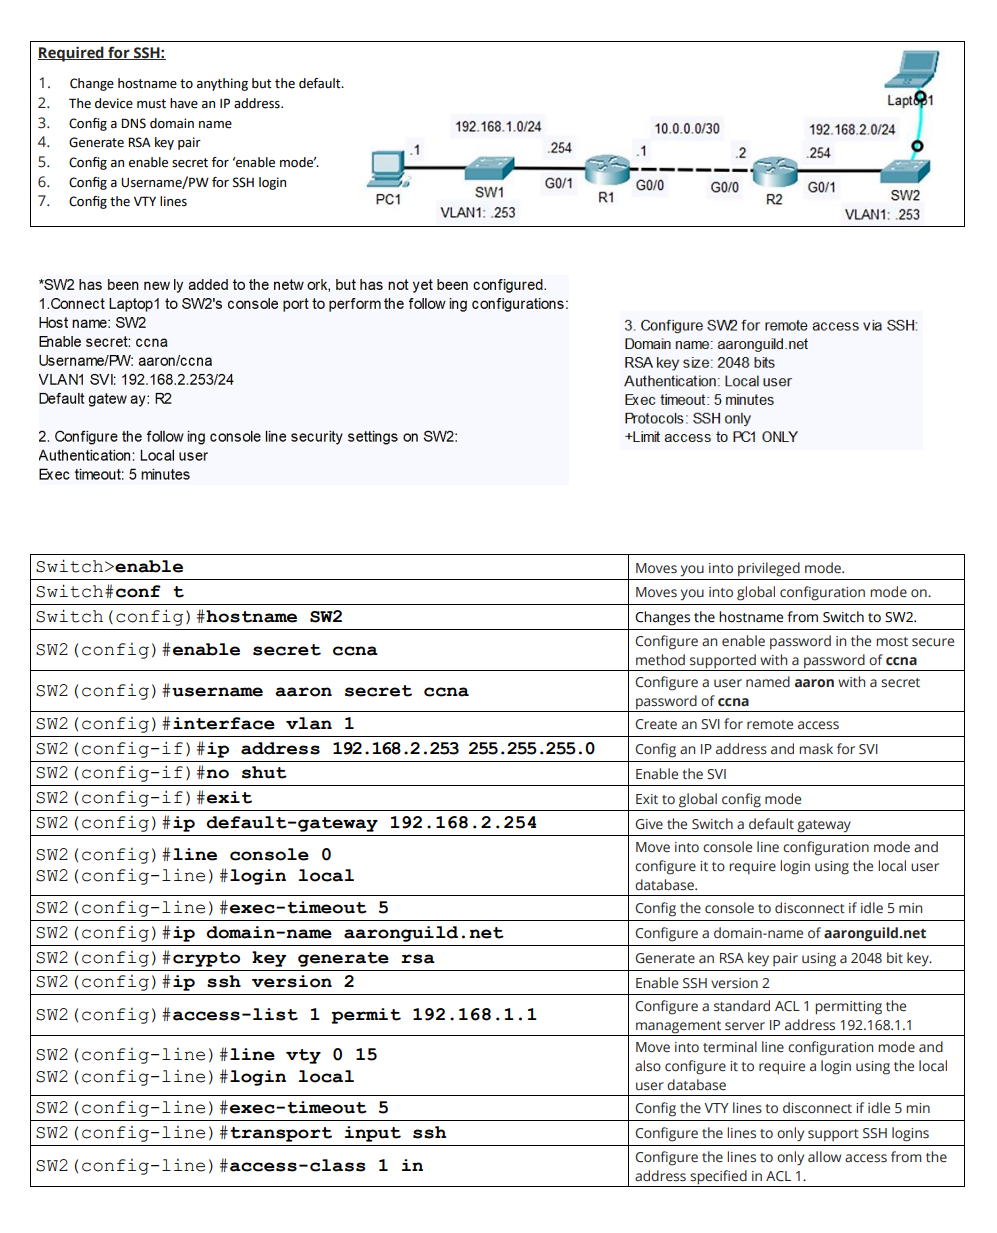
Now you’re ready to actually start the SSH configuration process. Use the below commands to correctly finish the labs:
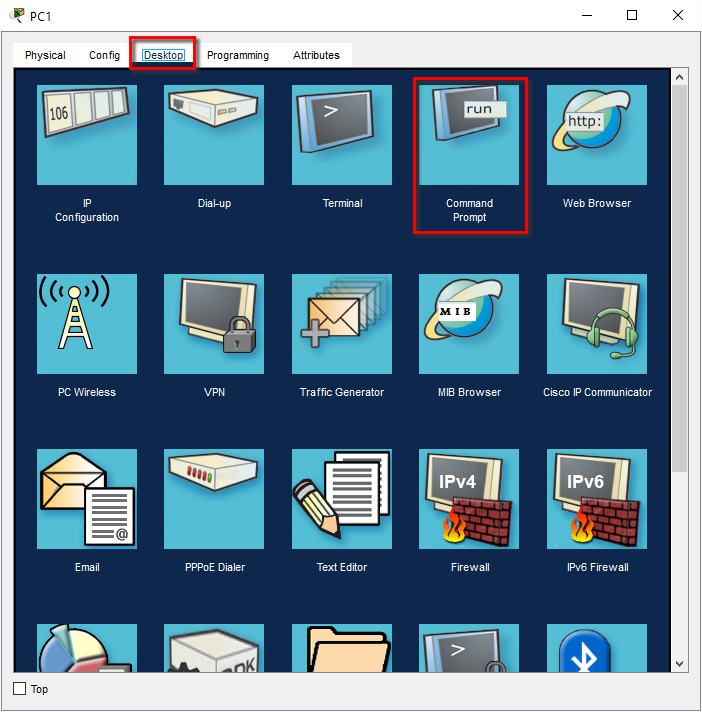
Test the configuration by connecting to SW2 via SSH from PC1 > Desktop > Command Prompt:
In PC1s command prompt issue the following command:
ssh -l aaron 192.168.2.253
Enter the password: ccna
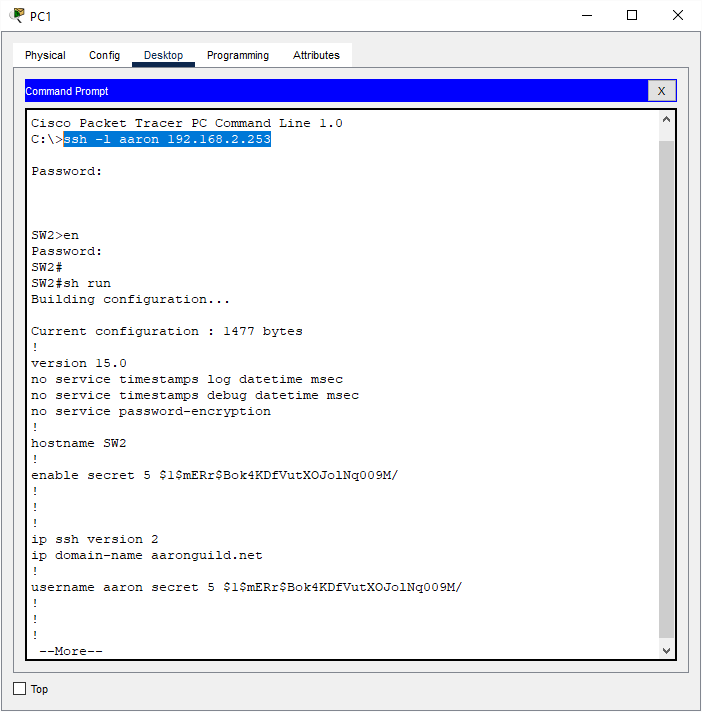
And it works! You’re now remotely connected to SW2 over the Secure Shell protocol.